Restoration and Review: Caswell Stainless Blackener
January 3, 2012
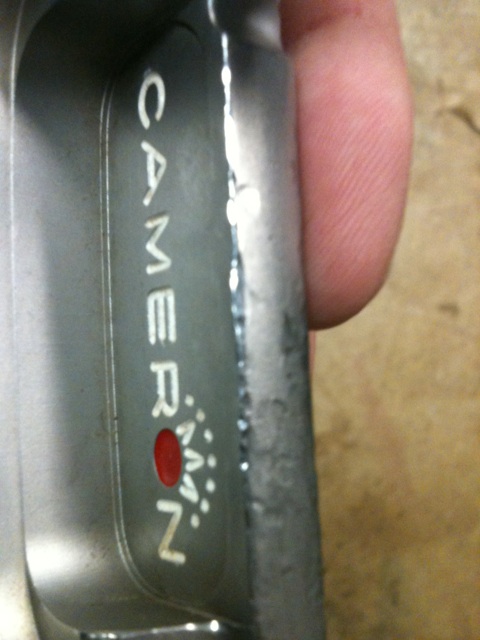
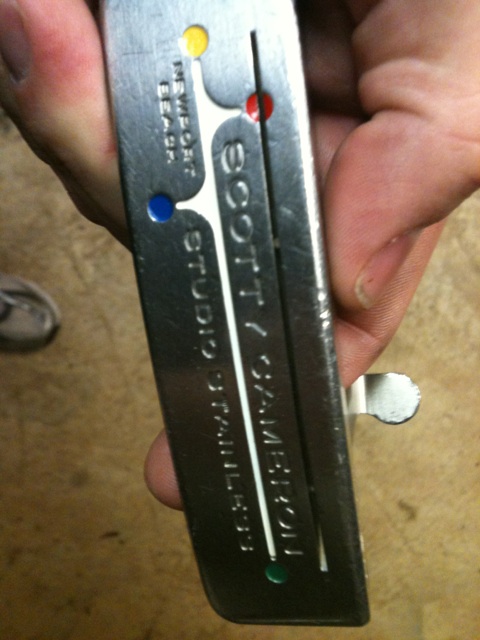
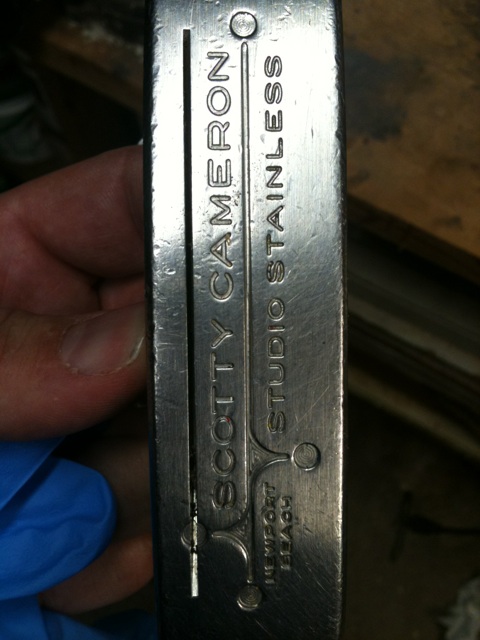
This post is a restoration of a Scotty Cameron Newport Beach that has seen better days. The purpose of this is to review Caswell’s Stainless Blackener product.
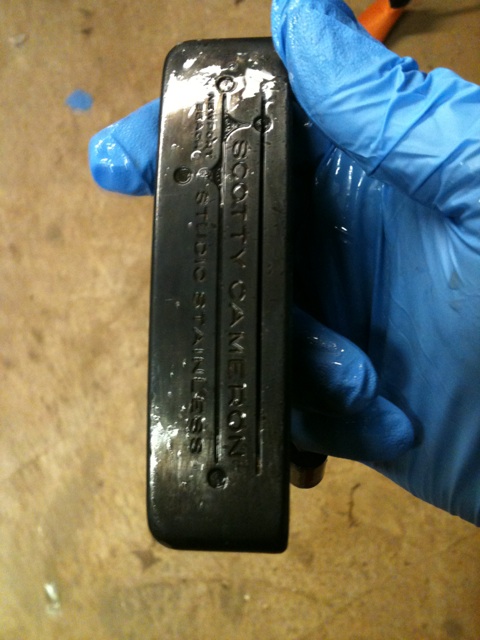
The putter is seen in the photos below before restoration.
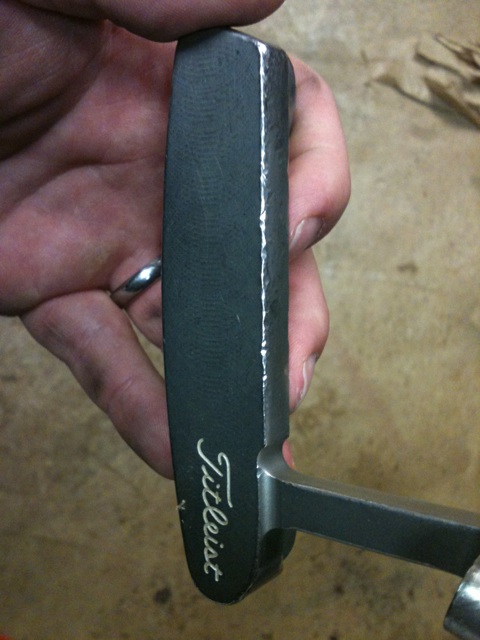


As you can see, it’s had a rough time. I’m hoping to show that it’s possible to make a putter look better simply by blackening the finish. I’m not sure what I’ll get here.
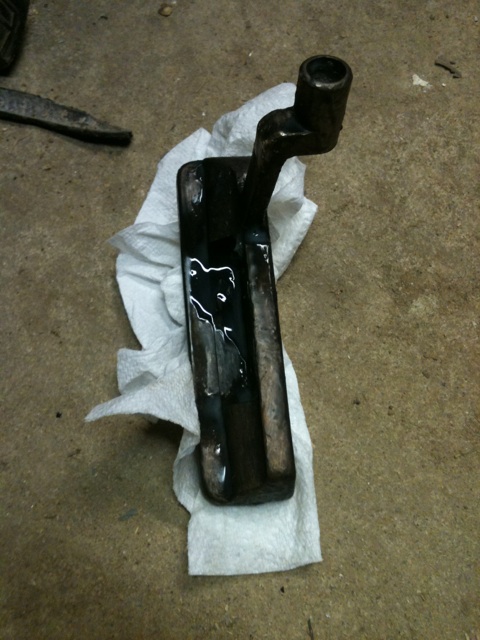
The first step is to remove all of the paint fill. Don’t mess around with acetone, as it can take awhile. Instead, as LG noted in his post on removing paint fill from irons (see https://thepowerfade.wordpress.com/2010/12/17/quick-tip-new-life-for-old-irons/), automotive paint stripper works very well and very quickly with little work.
The process of putting the blackening on can be done several different ways. This blackener is gel. Once the blackener is applied, a sealant is used. Both are included with the kit:

First, you must clean the steel with water. Soap would probably help. The instructions say “clean until it passes a water break test.” Essentially, clean it until water flows over it evenly, without breaking.
The blackener is applied by simply placing on the putter and allowing it to work. I found that it worked best for me if I used a gloved hand (VERY IMPORTANT OR YOUR HANDS WILL STINK LIKE CRAZY) and continuously rubbed it around. This process helped get a little more even coating.


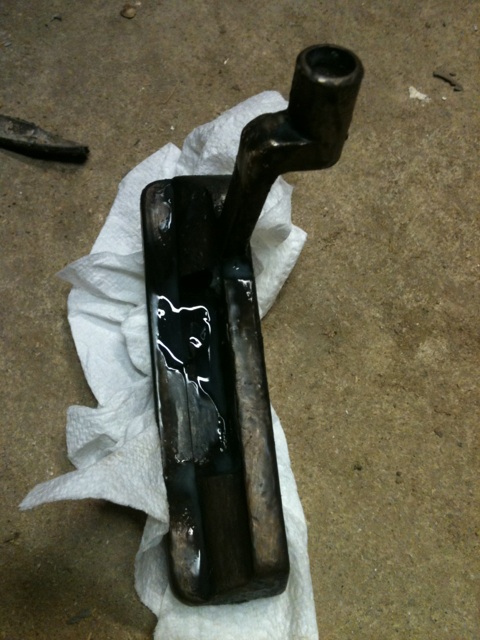
When finished, rinse with water and apply the sealant.

Once the sealant is applied, the putter is virtually done. Clean it up with water and take photos


This process was remarkably easy. Although it didn’t turn out as well as some of the professionally blackened putters, it nonetheless has real potential to turn out that way if continuously applied. A few more applications and I’m certain it would be nice and dark.
I got this kit second hand for $25. I believe they’re around $40 new, but there is enough to do a number of putters if you chose to.
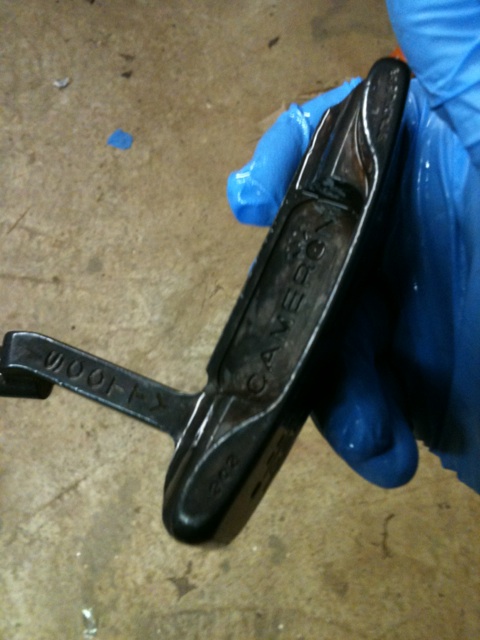
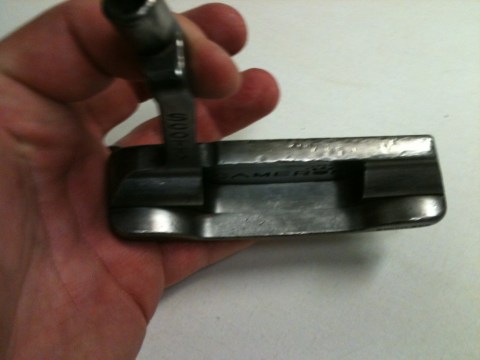
As for results, well, it doesn’t look perfect. And, as I often find with putter finishing, the better-prepped the surface, the better the finish looks. For example, on this putter, the sole turned out the best with a nice dark, even color. However, it does look better than it used to, and it did give me a chance to play around with this stuff. I’ll do some restoration work, take the dings out, and then re-blacken it in the future.
Cost: 6
Value: 7
Ease of Use: 8
Finish: 8
Overall: 8
We’ll see how it turns out once the full restoration and ding removal happens. I’m sure it would probably give me a much more favorable opinion on this product.


October 26, 2012 at 12:04 am
It is almost too simple. Blackening – there seem to be uneven blotch while the gel is applied; is this normal? What did you use to apply the gel – just your gloved hand? What is I want to add color on the stamps – when does that come in or does it not come in when blackened?
October 26, 2012 at 9:05 am
Yes, I did experience the blotchiness at first. You cannot simply put it on and wait. You need to continue to work the blackener around with a gloved hand to keep it even, and follow-up immediately after with 0000 steel wool and another coat, working that around to get it even. That is how I got my best results.
As to paint fill, you can add paint fill after finishing and sealing. Paint fill is easy–just a little nail polish or tamiya acrylic paint and you’re good to go. If it doesn’t work right, just take it off with some acetone and start over–acetone will not harm the blackener finish once it is sealed.
October 26, 2012 at 9:42 am
also, see the re-restoration here: https://thepowerfade.com/2012/01/07/restoring-a-putter-part-2-and-review-of-caswell-blackener-part-2/
December 14, 2013 at 3:49 pm
is there a way i can ask him if he can do anything with my 1997 prototype
August 2, 2014 at 3:30 pm
Love your blog. I tried to do this same thing w my newport 303 studio stainless. Worked the castle blackener in for 5 min, the putter didn’t change color at all. it was disappointing because I love how yours looks. Any ideas why it didn’t change?
Appreciate you taking the time to make this blog, I read every entry.
August 10, 2014 at 10:27 am
I don’t have a great answer. the newport beach is a 303 studio stainless. there is no reason why this shouldn’t work with all of these products. It’s possible yours has some coating on it. Perhaps someone put a clear coat on it at some point. It’s also possible that you just didn’t do it long enough, but 5 mins and you should see something. It’s also possible that some part of your prep work was not correct, but obviously I can’t check that.