This post follows up on the Caswell Stainless Blackener post found at https://thepowerfade.wordpress.com/2012/01/03/restoration-and-review-caswell-stainless-blackener/ and on the Club Repair post found at https://thepowerfade.wordpress.com/2011/12/12/club-repair-restoring-a-putter-part-1/.
I decided that, although the Caswell was helpful, it was not perfect. Thus, I went ahead and smoothed out the dings. I used a flat file to take out the big dings (if you decide to do this, you must be very careful wit the flat file–it can do a lot of damage). Then, progressive sanding with 60 grit, 180 grit, and then 400 grit sandpaper smoothed out most of the dings. In some cases, I did have to go back with the 60 grit because the scratches with the flat file were very evident. Even then, I still haven’t totally gotten all of the marks off of it.
The reason I did not go beyond 400 grit in this case is twofold: first, I didn’t have the time to get everything perfect and make a mirror shine. The several dings that are there would be much more evident if the rest of the putter were mirror finished; second, I wanted to keep the mill marks on the face, which meant no sanding of the face of the putter. I reasoned that, if I didn’t go beyond 400 grit, the face wouldn’t look too far off from the rest of the putter (since I don’t have a bead blasting cabinet). The process and results are below.
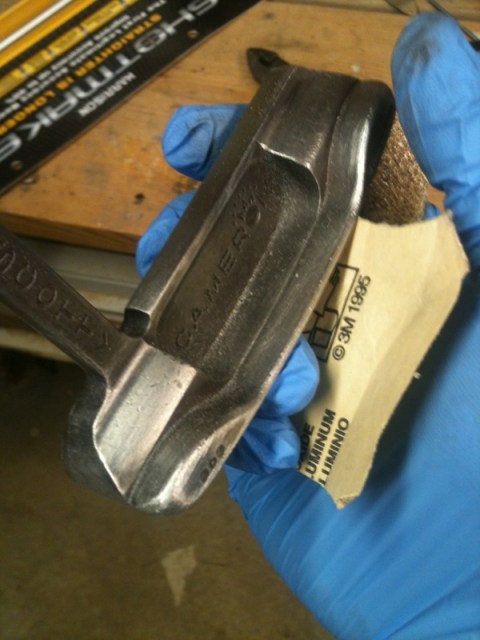
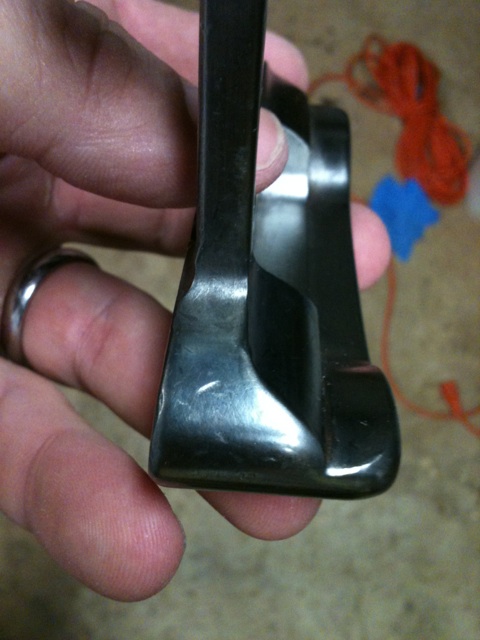
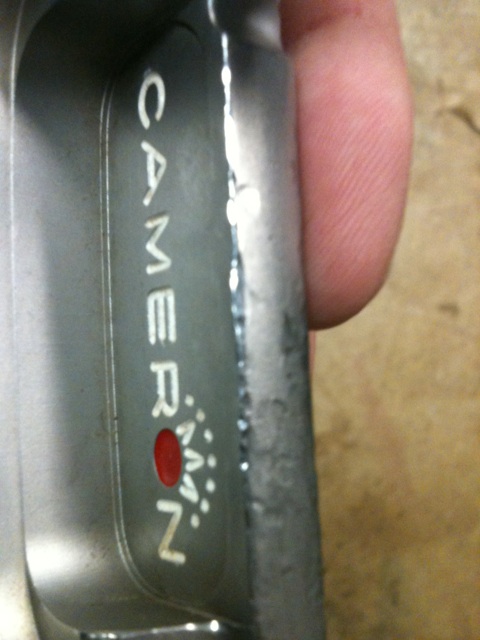
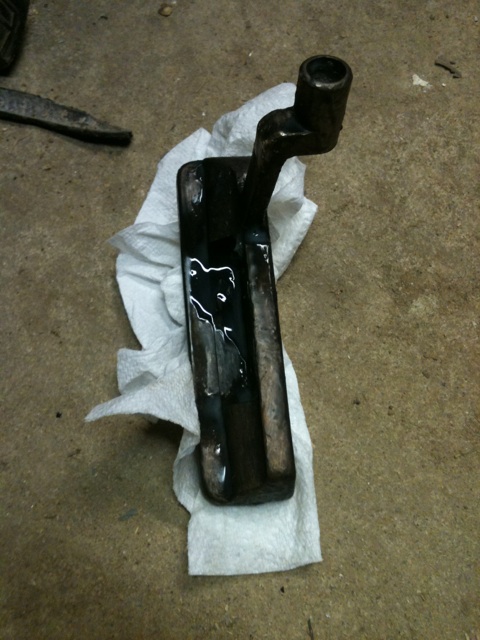
Here is the head before significant sanding. You can see that the blackener worked well before. Part of the sanding will help me take off that blackened finish.

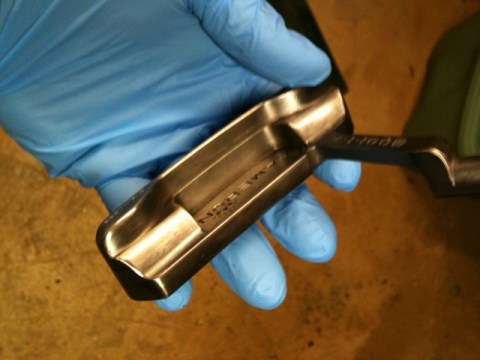
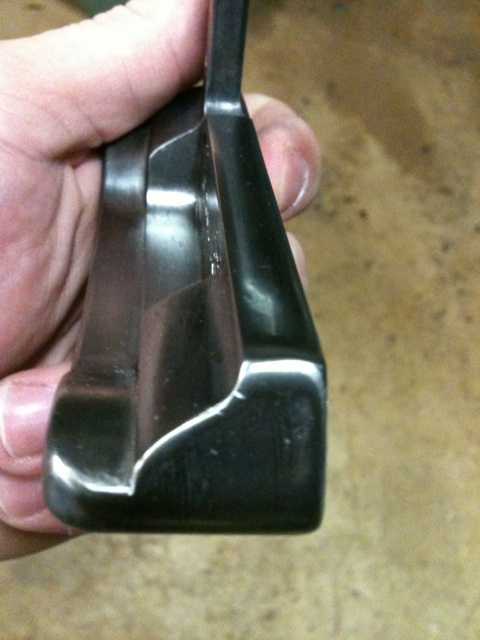
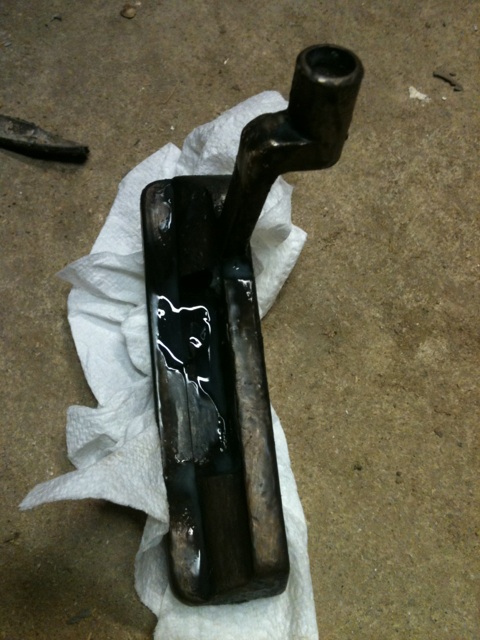
When the sole is partially sanded and partially blackened, it’s easy to see where the dings are. Ouch!

I’m staying away from the face as much as possible. The dings on the top line are hard to deal with when doing this because you can’t easily smooth them out without affecting the mill marks. I’ll do my best.

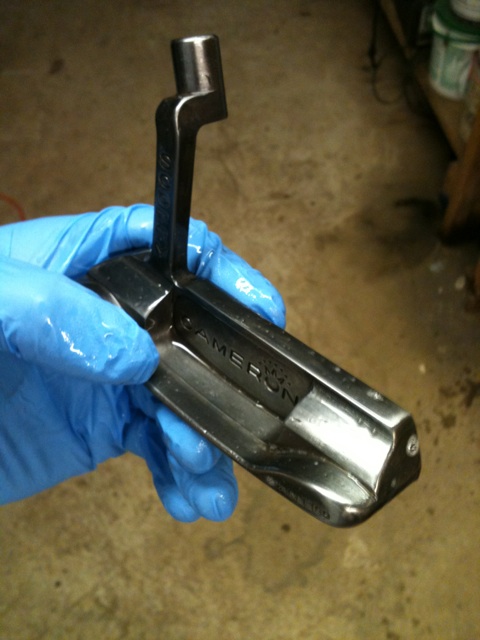
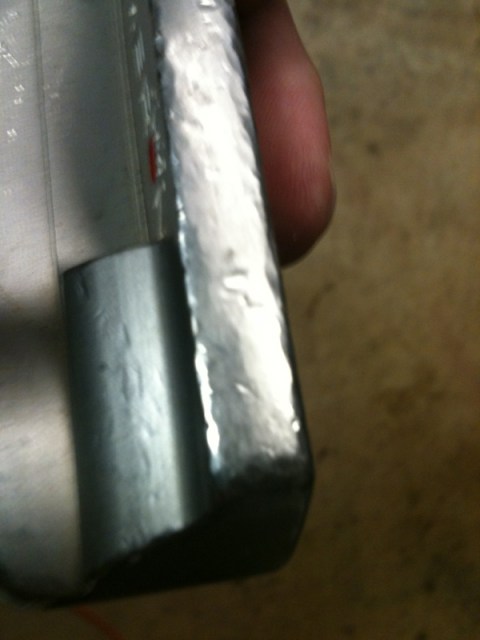
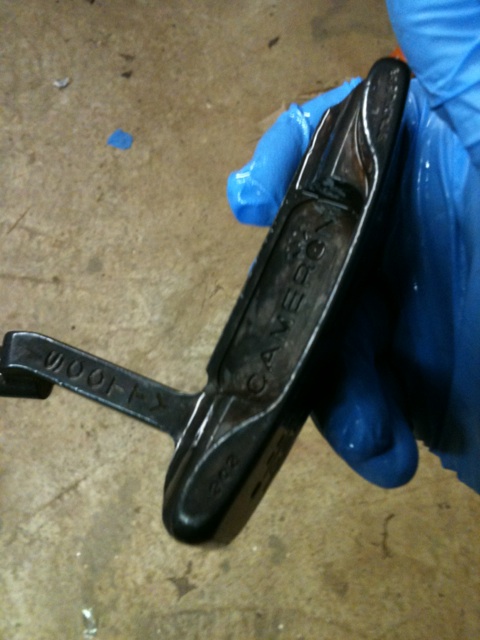
See how much smoother the heel is now that it’s been filed and 60-gritted?
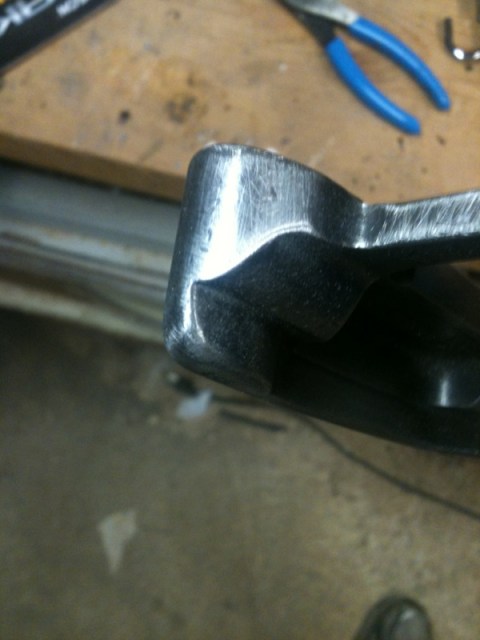
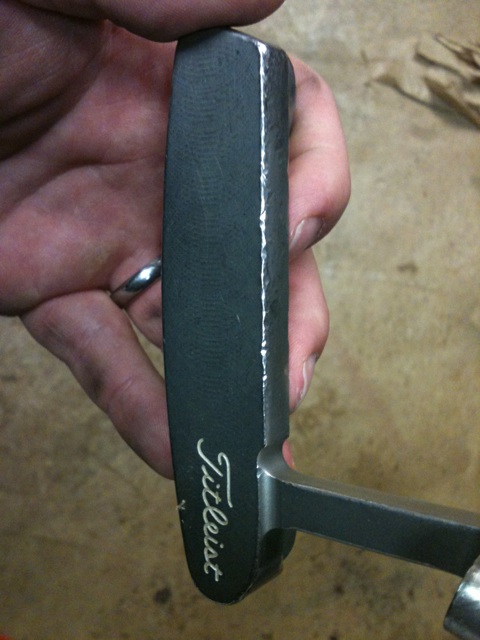
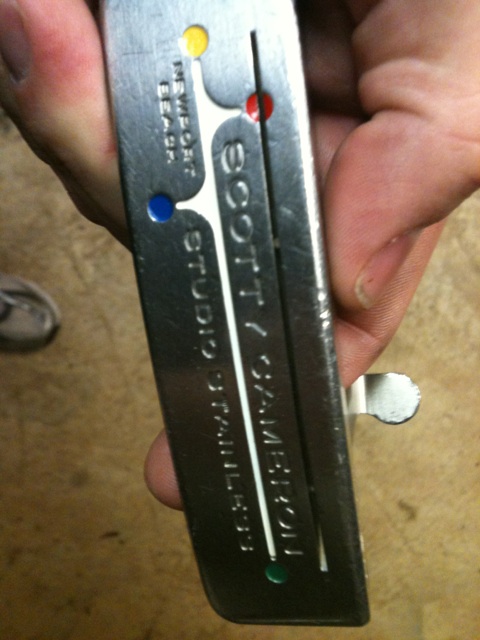
The top line looks 1000x better now.

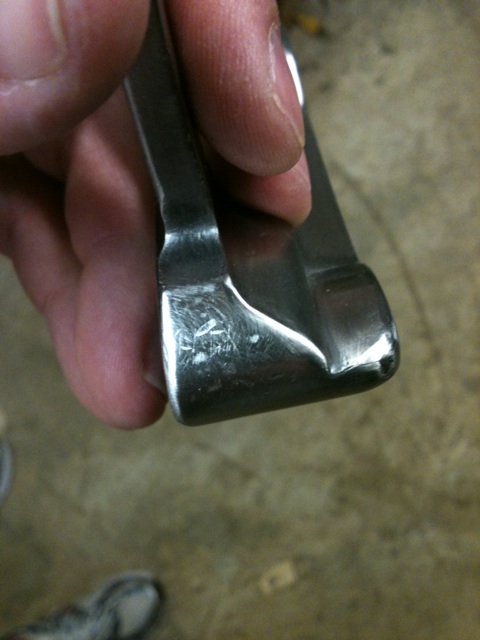
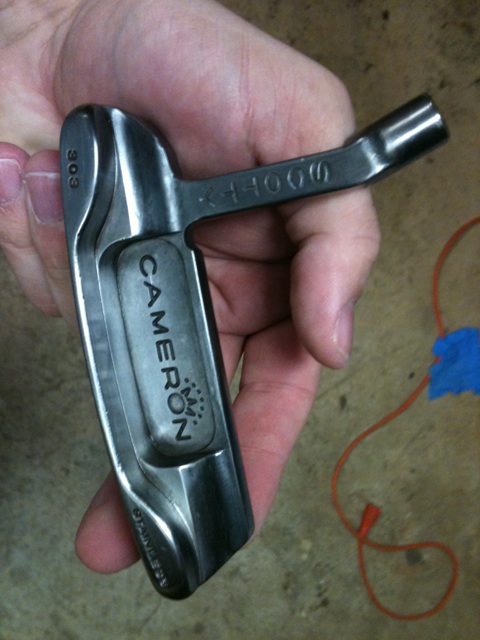
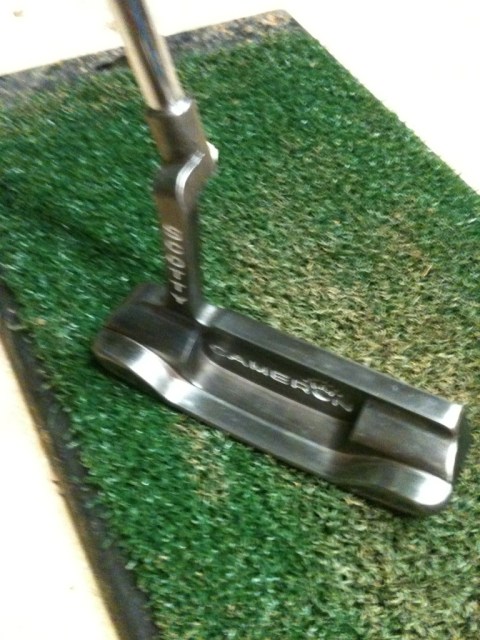
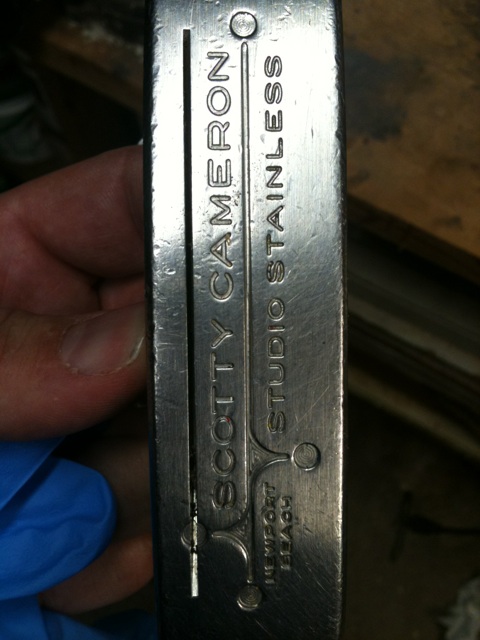
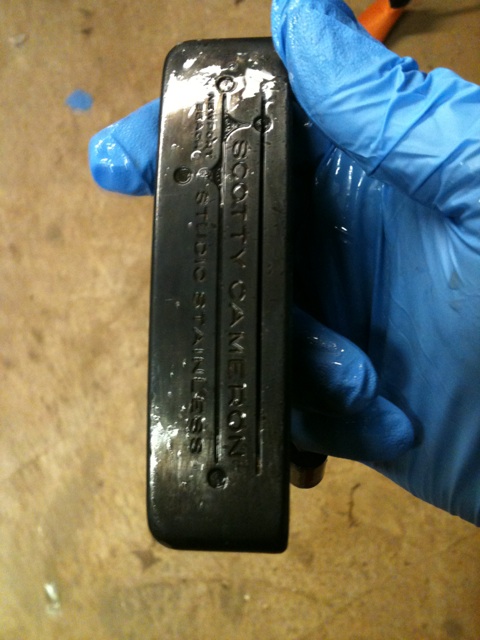
And now, after complete sanding with progressive grits, you can see there is a little shine to the head, but not like the mirror finish in other posts (see https://thepowerfade.wordpress.com/2011/12/12/club-repair-restoring-a-putter-part-1/)


I’ve cleaned up the face just a bit with 400 grit paper to help the blackener stay smooth.

Here’s the final top line. Looks a lot better

Blackening was virtually the same process. This time, I used much less blackening paste and it worked out about the same, so conserve that stuff. It aint cheap.
I worked the blackener around with a GLOVED HAND (wear a glove, or your hands will really stink) to smooth it out. When the blackening was about even and had been on for a minute or so, I quenched it in a bucket of cold water and rubbed all of the paste off. Then I smoothed out the blackener by rubbing any uneven spots with steel wool. The result looks pretty good. (The wet looking photos have the sealer applied).


Altogether, not too bad. Here’s the final product:

Adding a little paint fill (there’s still more to go)

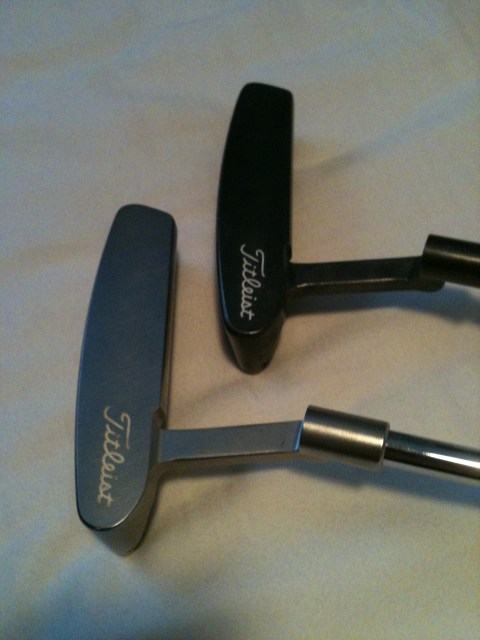
The color is kind of hard to see in the photos. Here’s a comparison to my stock Newport Beach.

Restoration and Review: Caswell Stainless Blackener
January 3, 2012
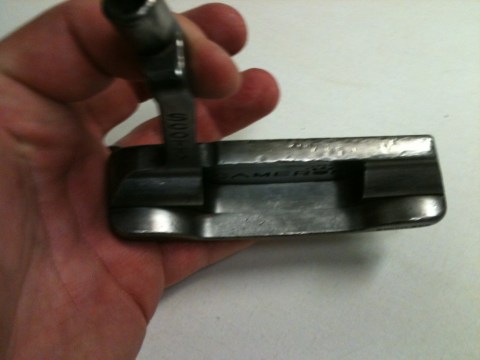
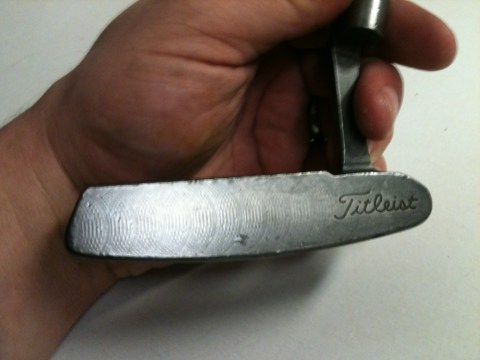
This post is a restoration of a Scotty Cameron Newport Beach that has seen better days. The purpose of this is to review Caswell’s Stainless Blackener product.
The putter is seen in the photos below before restoration.


As you can see, it’s had a rough time. I’m hoping to show that it’s possible to make a putter look better simply by blackening the finish. I’m not sure what I’ll get here.
The first step is to remove all of the paint fill. Don’t mess around with acetone, as it can take awhile. Instead, as LG noted in his post on removing paint fill from irons (see https://thepowerfade.wordpress.com/2010/12/17/quick-tip-new-life-for-old-irons/), automotive paint stripper works very well and very quickly with little work.
The process of putting the blackening on can be done several different ways. This blackener is gel. Once the blackener is applied, a sealant is used. Both are included with the kit:

First, you must clean the steel with water. Soap would probably help. The instructions say “clean until it passes a water break test.” Essentially, clean it until water flows over it evenly, without breaking.
The blackener is applied by simply placing on the putter and allowing it to work. I found that it worked best for me if I used a gloved hand (VERY IMPORTANT OR YOUR HANDS WILL STINK LIKE CRAZY) and continuously rubbed it around. This process helped get a little more even coating.


When finished, rinse with water and apply the sealant.

Once the sealant is applied, the putter is virtually done. Clean it up with water and take photos


This process was remarkably easy. Although it didn’t turn out as well as some of the professionally blackened putters, it nonetheless has real potential to turn out that way if continuously applied. A few more applications and I’m certain it would be nice and dark.
I got this kit second hand for $25. I believe they’re around $40 new, but there is enough to do a number of putters if you chose to.
As for results, well, it doesn’t look perfect. And, as I often find with putter finishing, the better-prepped the surface, the better the finish looks. For example, on this putter, the sole turned out the best with a nice dark, even color. However, it does look better than it used to, and it did give me a chance to play around with this stuff. I’ll do some restoration work, take the dings out, and then re-blacken it in the future.
Cost: 6
Value: 7
Ease of Use: 8
Finish: 8
Overall: 8
We’ll see how it turns out once the full restoration and ding removal happens. I’m sure it would probably give me a much more favorable opinion on this product.
Removing a Grip — Without Damaging It
December 31, 2011
This is a post that I put together in February of this year (2011). I never got around to posting it because the results were not great. However, I do think my experiences would be beneficial for someone out there looking to do this.
With this post, I was attempting to remove a putter grip without damaging it. Iomic grips can be $25/grip. As such, finding a cost-effective way of removing them from old putters can be a beneficial way to save money, as putter grips tend not to wear out as quickly as others. I had a putter with an Iomic grip, and I am not a fan of Iomic grips. I decided to pull it both because I had a friend I could give it to and because I thought it might be a good topic for the blog.
Here’s what I used:
1. mineral spirits
2. an old paper towel roll
3. a large plastic bag, preferably zip-lock (must be sealed to fluid–shopping/trash bags will not work)
4. a sink drain
5. a prop (in this case, a wire rack and a cutting board)
6. a screwdriver
Typically, when I install grips, I use standard grip tape. I place mineral spirits on the grip tape to loosen the bond, slide the grip on, wait 15 minutes, and I’m ready to go. I decided that this process might work in reverse–if I could get the mineral spirits inside the grip, perhaps I could slip it off.
To do this, I took the large plastic bag, and put it over the grip end of the shaft. I placed the bag and the putter grip (still over the end of the shaft) into the paper towel roll as a means to restrict the expansion of the bag, thereby requiring as little mineral spirits as possible into the bag. I then filled the bag up with mineral spirits until the level of the fluid was higher than the edge of the grip. I let it sit for 20 minutes to allow it to “soak in.” See photos below.


What I failed to realize is that the mineral spirits does not penetrate well. I’ve heard of others using WD-40 because it penetrates small spaces better and contains mineral spirits in it–I might try that next time. Regardless, my vision of the grip slipping off with ease was nowhere near reality. Instead, I worked the mineral spirits down into the grip using a screwdriver to GENTLY pry away the grip from the shaft (be careful–I’ve broken more than one grip trying to do this). Eventually, enough got in that I was able to twist some parts of the grip relative to the shaft. I worked at it for 15 or so minutes, which was an enormous amount of effort. Eventually, the grip came loose.


If I had another Iomic grip, I could probably do this again with better success if I tried WD-40 instead and/or if I had a better tool to work the mineral spirits down into the grip. Something thin, fairly rigid, and as long as the grip would work best–perhaps a portion of an old shaft? Regardless, the method did work, but it was not as simple as I expected. It probably would not be worth the effort for a $4 Lampkin or Golf Pride grip.
If you have access to an air compressor, use that method (blowing into the hole on the end of the grip). However, if you’re like me and prefer an at-home DIY method, this might be a viable method, assuming you make a few tweaks.
——————————————–
12/31/2011 Update
I tried this method again recently, except I did two things differently. First, I did not soak the grip as shown. Instead, I just used a small screwdriver to pry the grip away and squirted fluid between the grip and shaft, working the grip around until it came off. Second, I used acetone instead of mineral spirits, which worked MUCH better. Some photos are shown below.


The issue with this method is shown in the last photo. If your grip has anything painted on it, acetone may loosen the paint and cause some damage. However, for most grips, this isn’t an issue, and you’ll be able to save it without much loss–or, you can simply repaint the portions missing.
How to Swingweight a Set
March 23, 2011
This particular article will be helpful for LG, so I decided to go ahead and build up a post about this.
I recently swingweighted my iron set–KZG ZO blades. The shafts were shorter than I was used to, so I decided I wanted them to play at a higher swingweight in order to make up the lost leverage.
First things first, get your supplies in order:
1. Two-part epoxy – depends on size, but enough for this job is $5 or so.
2. ferrules – make sure you get the right size for your irons, which can range from .335 to .370; I bought mine on ebay, and you can really spend any amount of money you want to on them. Approximately $5, we’ll say. Search on ebay for “ferrule .XXX” where .XXX is the tip diameter you need.
3. Swingweights. This part is a little more difficult, and can be expensive. A full set of swingweights isn’t a good idea. I would recommend you figure out what you need first and then go online and buy them. I got brass weights on ebay from a great seller todd1186 (he’ll combine shipping if you just ask, see http://cgi.ebay.com/6-Gram-Brass-Tip-Weights-370-Steel-Iron-1-Dozen-/250722289456?pt=LH_DefaultDomain_0&hash=item3a60368730).
4. A swingweight scale. These can be anywhere from $20 used up to hundreds. If you’d prefer not to use one, you can always take them to your local golfsmith or edwin watts store and ask them to spec it out for you. If they’re not busy, they might actually do it, especially if you’re telling them you’re considering having them swingweighted.
5. Acetone. $4 at home depot
6. A kitchen/postal scale. $4-$6 on ebay
7. Lead tape (or other weight)
Now, that’s about it for supplies–sans paper towels, newspaper, and other cheap stuff.
Once you know what your current swingweight is, you can decide what you want it to go to. Typically, you will want to increase swingweight because OEM sets are typically a little light on the scale. Typical sets will run D0 or lighter. Most pros like Read the rest of this entry »
Restoring a TeI3 Long Neck
March 16, 2011
Those who frequent the PF know how much I appreciate the ability to perform your own customization and repair work. Especially given the winter weather, I’ve spent a lot of time indoors and have had time to work on equipment (and posts about that work). Today’s post is no different.
I recently got a wild hare when I saw a post on GolfWRX about restoring a Scotty Cameron TeI3 putter (in 2 hours!). The pictures are gone, but the instructions still hold: http://www.golfwrx.com/forums/topic/444256-how-to-restore-a-scotty-tei3-in-2-hours/.
Following this advice, I got out the sandpaper (from the repainting thread, https://thepowerfade.wordpress.com/2010/11/30/repainting-a-club/) and purchased Birchwood Casey Super Blue and Alex Ultra (for elastomer). The B/C cost me about $9 (which was overprice–it should have been under $6, but it was convenient) and the elastomer cost me $4. I also purchased Sally Hansen Hard As Nails fingernail paint to do the paint fill ($2).
The instructions do an excellent job of laying out what to do, but I also got some personal attention from the OP. I purchased a TeI3 with a problem and decided to set myself to work. Here is what it originally looked like:


As you can see, there are rust spots and a few dings, including one on the rear flange and a pretty significant one on the face.
I started by taking a single bastard file (that’s what it’s called…really) which is basically just a flat file with only one line of “cutters.” As stated in the WRX post, I left the insert in the cavity while filing to make sure they were at least planed with respect to each other. The difficult part is getting it consistent without making big scratch marks. I found that the dings came out pretty easily, but the file itself left scratch marks that I had to massage with light pressure on the file and progressive grits of sandpaper to get smooth.
Once I had the dings out, the KEY is to make sure you POLISH IT with sandpaper–and do it EVERYWHERE. Don’t skimp. All the little crannies, all the surfaces, make sure each of them SHINE with at least 800 grit. I went up to 1000 or 1500 (cant remember which) just to be sure. It hurts. It takes forever. At this point, I was thinking “why the hell did I do this.”
Then, you blue it with B/C. In my experience, this was awful. I could never get it dark enough to make it look like either (1) original or (2) how the OP on WRX did. You have to put the gun blue on, then wait 30 seconds, wash with cold water, then smooth with steel wool, then rub with degreaser (I used Simple Green), then wash the degreaser off with cold water, then dry with a hairdryer until bone dry, and then reapply until the color is as dark as you want. However, I got to the point where I would put the blue on, work with the steel wool, and the color would come right back off with the steel wool. I finally resigned myself to the fact that it wasn’t going to get any darker and it looked OK as a light brown finish. After some more smoothing with steel wool, I cleaned it, oiled with baby oil, and degreased to make a nice clean surface. I put in the elastomer (as per the WRX post), screwed the insert in, and cleaned off. Then I applied the white “paint fill” (nail polish) and the gold paint fill (gold instead of copper because I had some gold lying around). The result is below:


Practice pointer here: if you’re using gun blue, WEAR THE GLOVES like the OP says. Otherwise, your hands end up smelling like cat piss for about 3 days (I know), and you can’t wash it off. Further, do the sanding outside/somewhere ventilated. And, most importantly, don’t be afraid to take your time. The project is kind of complicated (especially the first time). In fact, I’d recommend you don’t do it, but, then again, I did it, so I can’t prevent you from it. Hopefully it will turn out better for you. I just didn’t know how to gun blue. All in all, though, I’m actually pretty happy.
What it costs/what I needed:
1) a TeI3 putter (anywhere from $70 to $170 depending on how bad it is)
2) gun blue ($6)
3) elastomer ($4)
4) “paint” (about $5)
5) sandpaper (already had from previous postings, but about $10)
6) steel wool (about $3)
7) a hair dryer (you should probably have one)
8) paper towels (minimal)
How to Grind a Wedge
February 14, 2011
To start, I always like to point to my references. GolfWRX provides the background again:
http://www.golfwrx.com/forums/topic/53415-diary-of-a-wedge-grind/
http://www.golfwrx.com/forums/topic/22167-grinding-a-wedge/
Grinding a wedge is a pretty neat process. It takes a lot of patience, care, and confidence to do it right. But making a club that’s exactly to your own specs is pretty amazing–and, of course, I wouldn’t do it if it weren’t at least a little fun.
I started with an old wedge–Tommy Armour. It had an ungodly amount of bounce, so I decided it was a good test piece. If you don’t have a wedge you want to sacrifice, Golfsmith sells grinding blanks for $10/head (see http://www.golfsmith.com/products/SE2886/Snake_Eyes/Custom_Grind_Wedge_Head). Pics of my starting wedge below:


Before starting, you need:
1) either a belt sander or a grinding wheel
2) a sharpie
3) gloves
4) safety glasses
For my wedge grind, I decided to pull the shaft from the head, as it’s usually easier to maneuver the head by itself without the shaft.


As shown in the references, the next thing to do is mark the grind with a sharpie. My goal was to replicate the Chikara wedge grind. Photos below show the Chikaras and my sharpie marking.


The advice from the WRX postings is to start where you have the most room to mess up–or, in other words, start with the place where the most material will be taken off, as you can fix a problem there easily. This was GREAT advice, as you really need to get a feel for it as you go.
I added the passes in relation to the shapie markings. The result…less than stunning.


The reason for the “bad” results was that I used a grinder. A stationary belt sander would work a whole lot better and make a much smoother cut.
However, not to worry. A WRX’er suggested that I use a metal file to smooth out the bumps. After some elbow grease, the grind looked smooth and consistent.


After a bit of sanding, the grind was done.
Altogether, I enjoyed the project. I’m not sure I’m ready to try it on my gamers. I took off A LOT of material, and I think the weight of the head really went down. However, I enjoyed the process, and now I know I COULD do it if I really wanted to.
Happy club work!
Oh, and, BTW, happy Valentine’s Day!
Pulling a Shaft: Question from GolfWRX Member
February 7, 2011
A GolfWRX member sent me a message about pulling shafts after viewing the post on replacing a Sonartec shaft, located at https://thepowerfade.wordpress.com/2010/10/17/how-i-do-club-repair-and-you-can-too/. Check out the interaction below:
———————————————————————————————–
Sent 13 January 2011 – 12:36 PM
Hey man. A few quick questions for ya. I live in Pittsburgh PA and since we have 7 inches of snow, there will be no more golf. Time for some DIY golf.
I have some limited experience with golf DIY. I was able to refinish and regroove 2 wedges a few months ago. I did the paintfill and everything.
I’m looking to refinish a set of 695cbs that I have. My questions come in here. The 2 wedges that I did before, I wasn’t worried about keeping the shafts as they were not wedges I planned on playing. So I just heated the s*** out of the shaft and pulled it out. Since these are a set of irons I plan on playing with, I want to take the heads off as carefully as possible.
What is the best way to pull iron shafts that I plan on playing with? They are steel. I assume that I will need new ferrules as well. Can you tell me that best and cheapest place you know to buy new ferrules? Really appreciate the help and great write up. If you have a writeup to link me to or if you have some step-by-step instructions, I would really appreciate it. Thx.
Sent 13 January 2011 – 01:45 PM
Sounds like a pretty easy job. Graphite is a lot harder to deal with.
Since you “heated the s***” out of the two wedges, I assume you already have a blow torch. I would make sure it’s a propane torch, as other types (acetylene, butane, for example) can get too hot and damage your club. I use a Bernz-O-Matic propane torch (about $20 at Home Depot).
Your ferrules will be irreparably damaged, yes. Before you remove the shaft, hit them with the torch for about 2 seconds so they melt a little bit, then let them cool for about 20 seconds and cut them off with a box cutter.
Once the ferrule is off, you don’t need any special equipment to take off an iron shaft (this is where the difference between graphite and steel is really seen). What I do is (1) put a heat-resistant glove on my left hand (I’m right-handed), (2) start the torch, (3) pick up the club in my left hand (held far enough away from the head that I don’t burn my glove), (4) heat the hosel, (5) put the torch down and turn it off, (6) switch hands so that I now hold the (unheated part of the) shaft in my right hand, (7) grip the head with my gloved left hand, and (8) give the club head a twist to see if the head has come loose. I usually start with about 25 seconds or so of heat, then try to twist, then 10s more of heat, then twist, then 10s, then twist, and so on until the epoxy bond breaks. MAKE SURE that you don’t just heat the hosel in one spot–continually move up and down the hosel and around the hosel (face side, crown side, sole side, etc.) so that you’re not focusing in one spot. This can cause overheating of the one spot, leaving marks and, possibly, damage to your club. Plus, it takes a lot longer. Heat loosens the epoxy bond. If you’re staying in one spot with the heat, it has to travel all the way around the shaft to get to the other side. That means that one side will be hotter than the other side. If you circulate around the hosel with the torch, the heat will be even all the way around, so you won’t have any hot spots, and it’ll go faster. As with all things, if you take your time, you should be OK.
As for ferrules, sorry I can’t help much. There are some threads on GolfWRX.com/forums if you want “custom” ferrules (where you can buy custom colors) and I know there are offerings available online. Otherwise, it’s usually best just to buy a pack at Golfsmith or on golfsmith.com (if you don’t have a golfsmith near you). Always make sure you get the right ones for your shaft diameter.
If you need any more help (how to get the ferrule on the shaft, how to clean out the hosel, etc.) let me know. I’m happy to help.
Sent 13 January 2011 – 02:03 PM
Thx for the reply. I really appreciate it.
I have Sensicore high launch shafts in my irons. Do you know how I would tell what diameter the shaft is and what diameter ferrules I would need?
Sent 13 January 2011 – 02:14 PM
Re the “diameter,” Titleist should have material online somewhere about the hosel bore for 695cbs. If you’d rather not waste your time, you can actually call Golfsmith–they have a book where they can look it up. Usually irons are .355, but you need to confirm before buying. Also, don’t do like my friend did and mix up .355 with .335.
Let me know how it goes or if you have more questions.
Sent 13 January 2011 – 02:43 PM
HAHA. Will do. Thx. I will call Golfsmith and find out. My time frame is really whenever I get home from work. I dont have anything to do now that there’s snow on the ground so I’ll be messing around with it at night. I’ll take some pics and if you want to use them great. I’ll shoot you a message if I have any other questions.
Thx again.
Stamping A Wedge
January 17, 2011
Here at the PF, we try to share both our accomplishments and failures with the community in hopes that we can help someone out there learn from both our successes and out mistakes. With that backdrop in mind, here is my description of stamping my own wedges.
I followed the directions listed at the links in our prior post on stamping/paint filling clubs, located at https://thepowerfade.wordpress.com/2010/12/18/great-link-to-stamppaint-fill-your-irons/.
I trolled eBay for the cheapest stamp set I could find and ended up with one that was $16 shipped. If you go to buy your own stamp set, make sure you check with the sellers to ensure that your stamps can be used on steel. Many of the stamps on eBay are designed for jewelry applications, which involve MUCH softer metals (gold, silver, etc.).
The photo below shows the supplies I needed, including:
1. A work bench of some type (could be just a table)
2. A hammer
3. A stamp set
4. Masking tape
5. Safety glasses (yes, potential shards of hardened steel breaking off and flying is a hazard for your eyes)
6. A golf club to be stamped (duh)
7. A test piece
8. Ibuprofen for when you smash your fingers (just kidding….kind of)

Here is a look at my stamp set. You can also see the test piece with markings in it from where I tested my stamp set on it.

My goal in this first stamping project was to stamp the number “53” on the bottom of my gap wedge, because I regularly grab it instead of the lob wedge or vice versa–they look the same when in the bag. Thus, I clamped the club in by the neck….but….

That was a bad idea. We’ll get to it later on in the post, but, suffice to say, if you’re clamping your work piece, do not try to clamp it on a rounded portion. Hitting the club head with a hammer will cause it to move (duh). This project was a bit difficult because I wanted to stamp the sole of the club. However, I should’ve known this setup wouldn’t work out.
The correct setup is below. Because the blade is actually clamped, the club will not move.

I taped the bottom of the club…

Then I held the stamp and hit it with the hammer. The following is the result.


A couple of things I learned from this. As you can see below in the red oval, the bottom of the “3” is moving down the club. This was a result of the bad clamping, which I discussed above. With each hammer strike, the club moved a little. Once I reclamped it on the blade, it was OK, and I was able to get the deep 3 located above the red oval.
A second learning experience was with the 5. Although you don’t need to swing the hammer very hard, you do need to strike the stamp about 15-20 times to get a nice deep stamping (at least on these wedges–it may be different with different metals). With that in mind, you need to be darn sure that the stamp itself doesn’t move. So, what I had to learn how to do was to hold down the stamp in contact with the club head, rather than simply holding it over the club head. In other words, I needed to actually be pushing the stamp into the club head to hold it in the exact place. Otherwise, it’ll move a bit, as you can see in the yellow circle.

But, with renewed enthusiasm, I tried it on the lob wedge, stamping with my initial “J.” I think it looks pretty good, despite a few errors.


One last thing I learned from the experience: don’t just try your technique on a test piece; perfect it on the test piece. Otherwise, you’ll end up with some errors. None of them bother me that much (because I’m just not that serious), but I know some of you out there (LG?) would be extremely bothered by an error on the club.
All in all, it’s not difficult, but it requires patience and absolute accuracy.
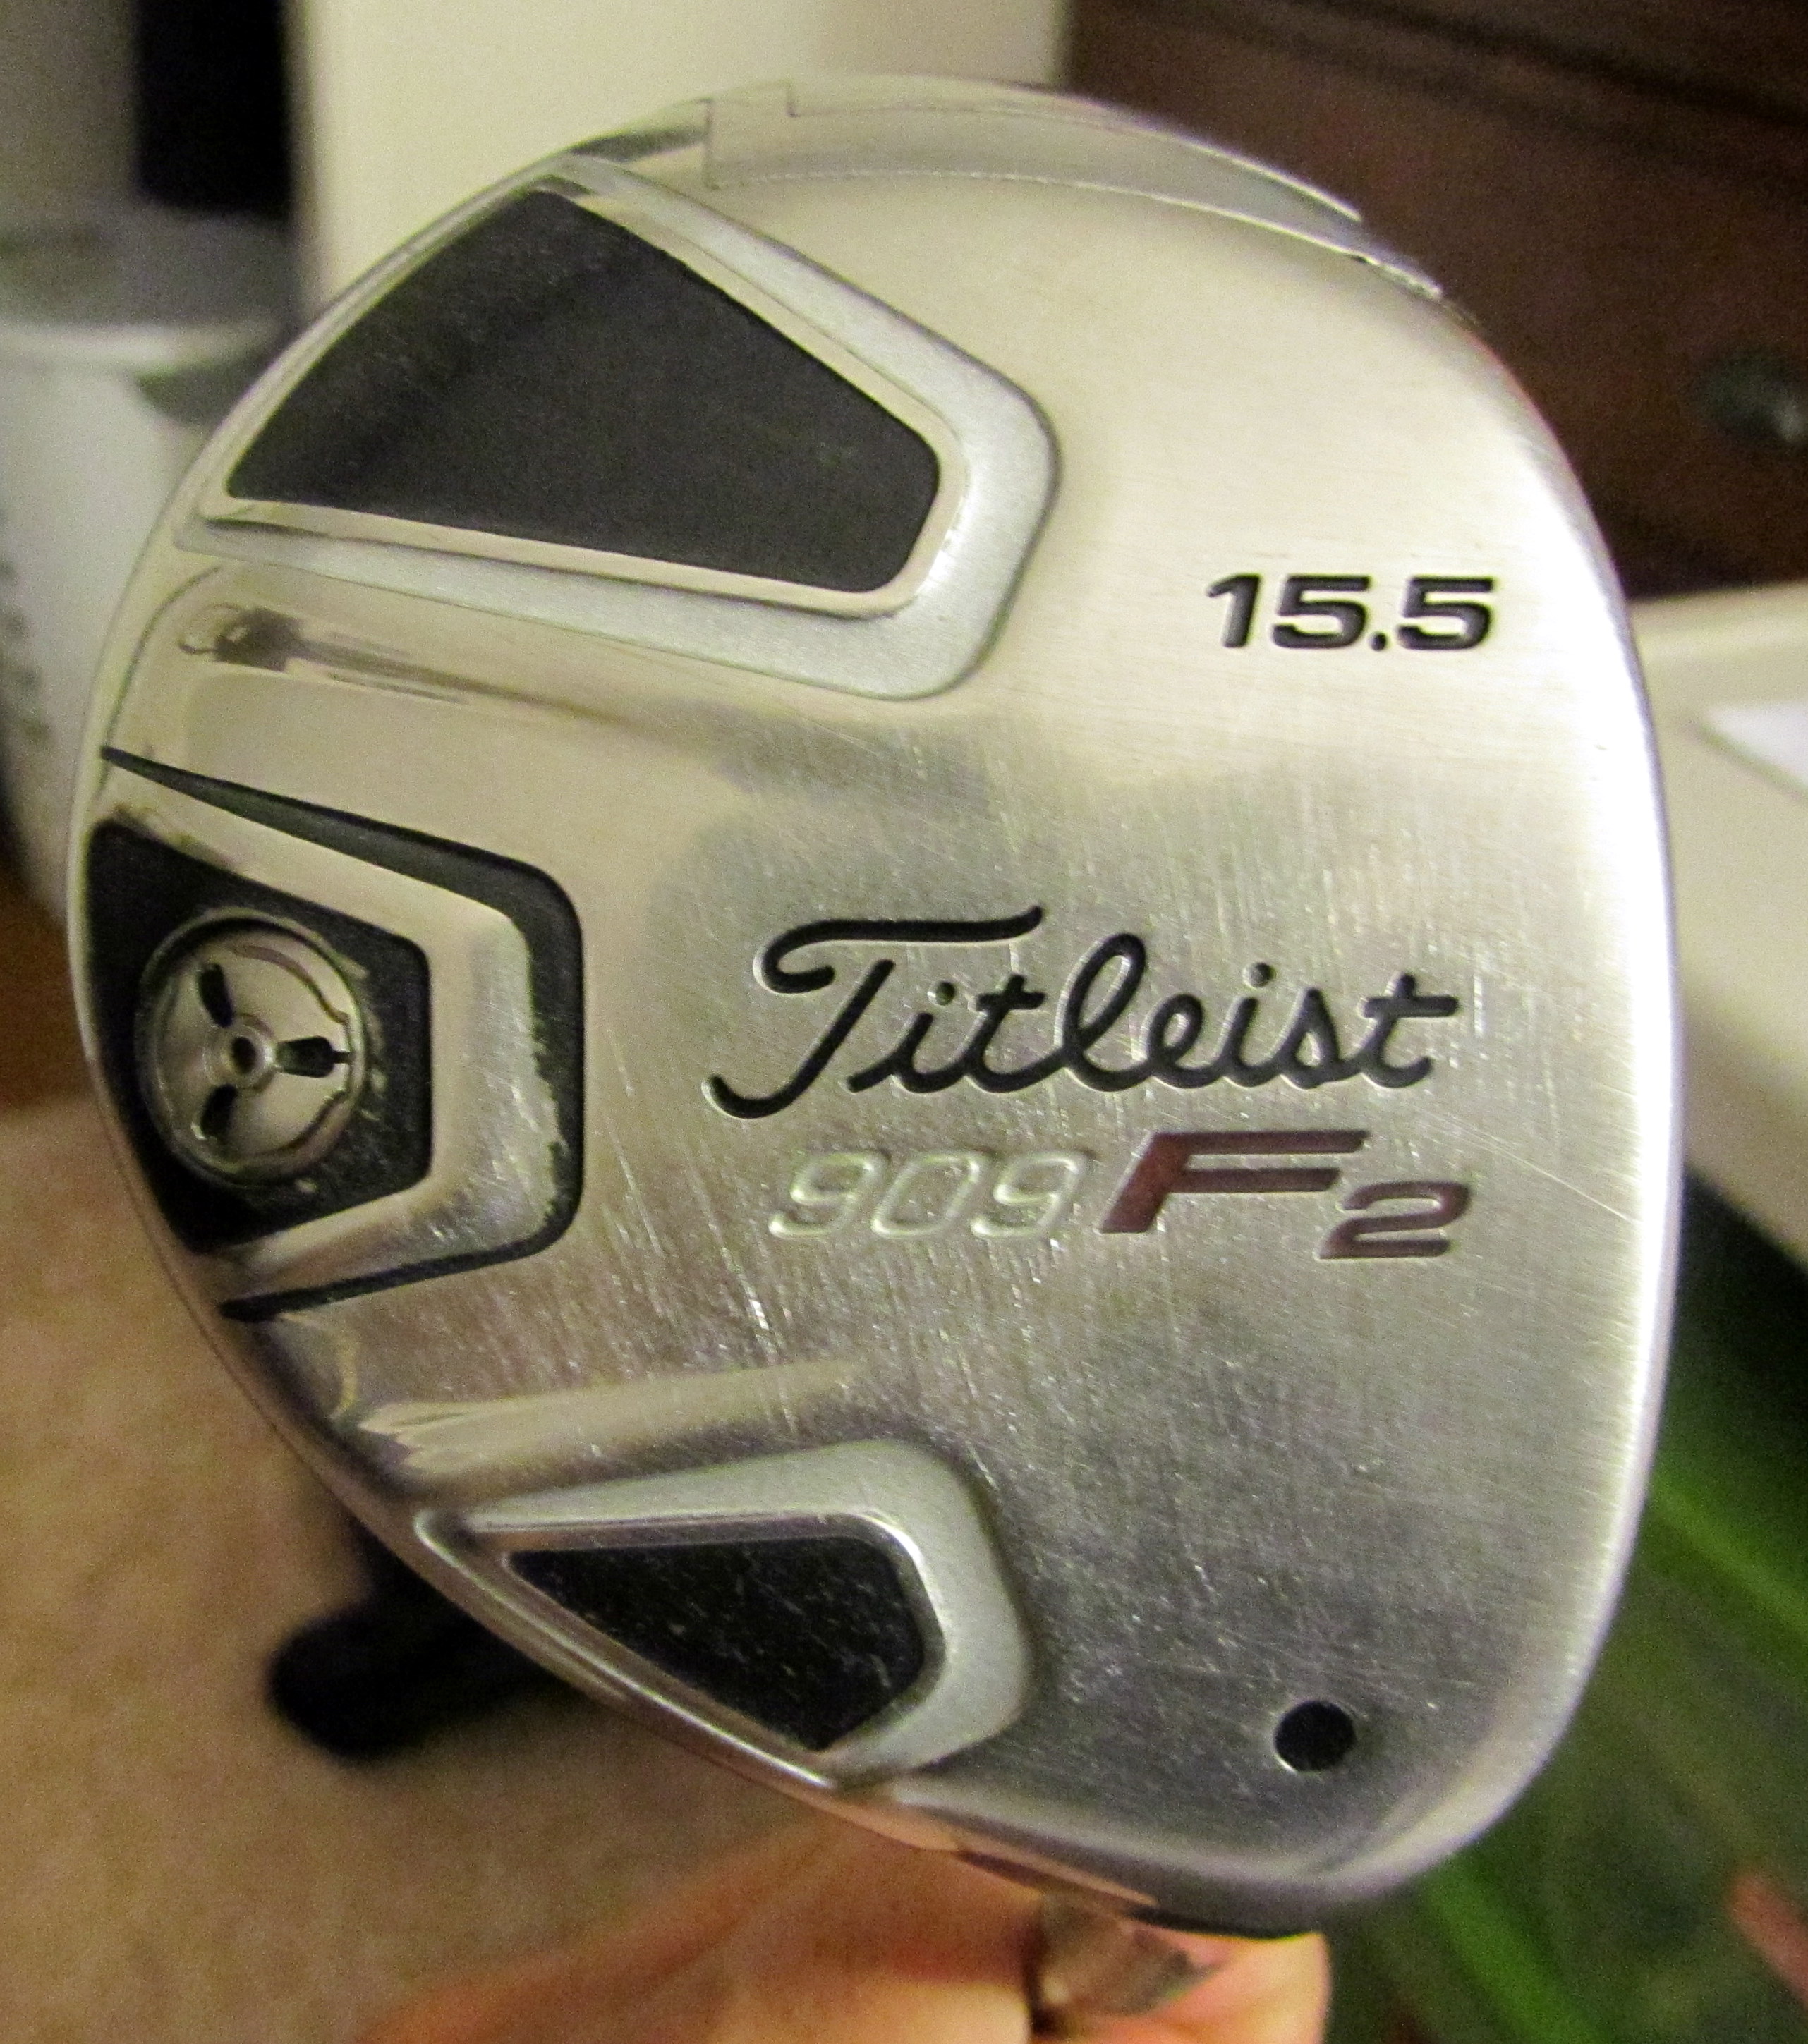
LG Painting a club: new tips
December 23, 2010
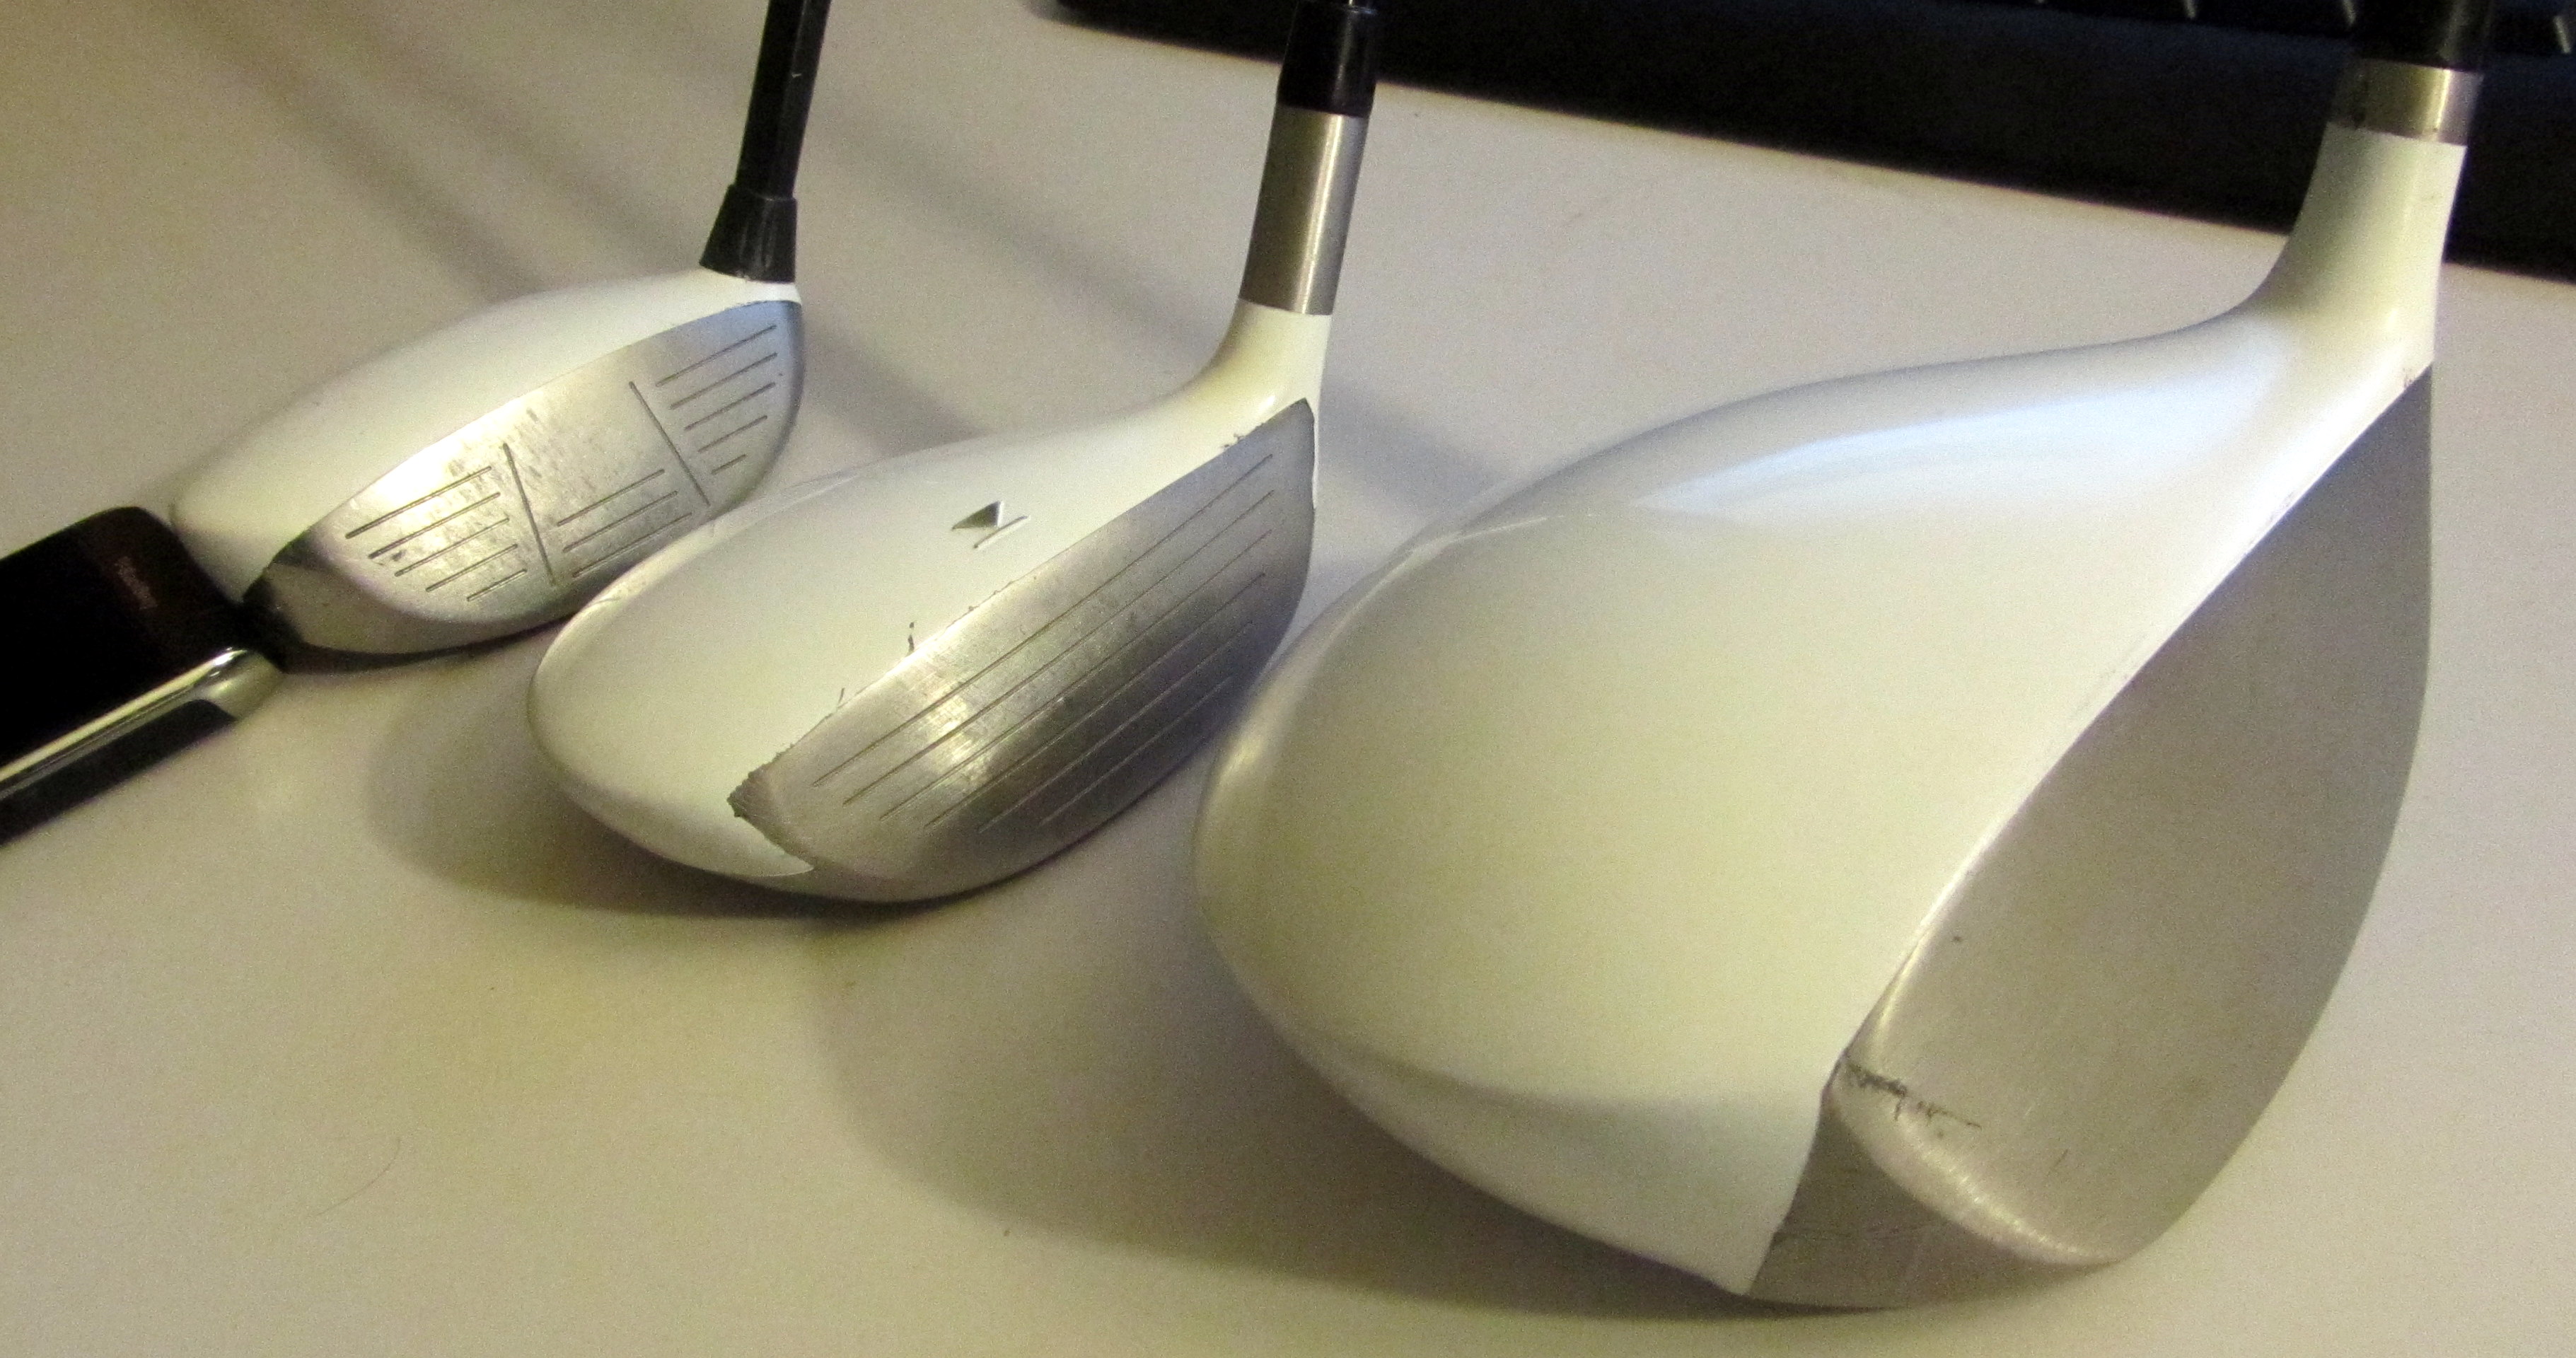
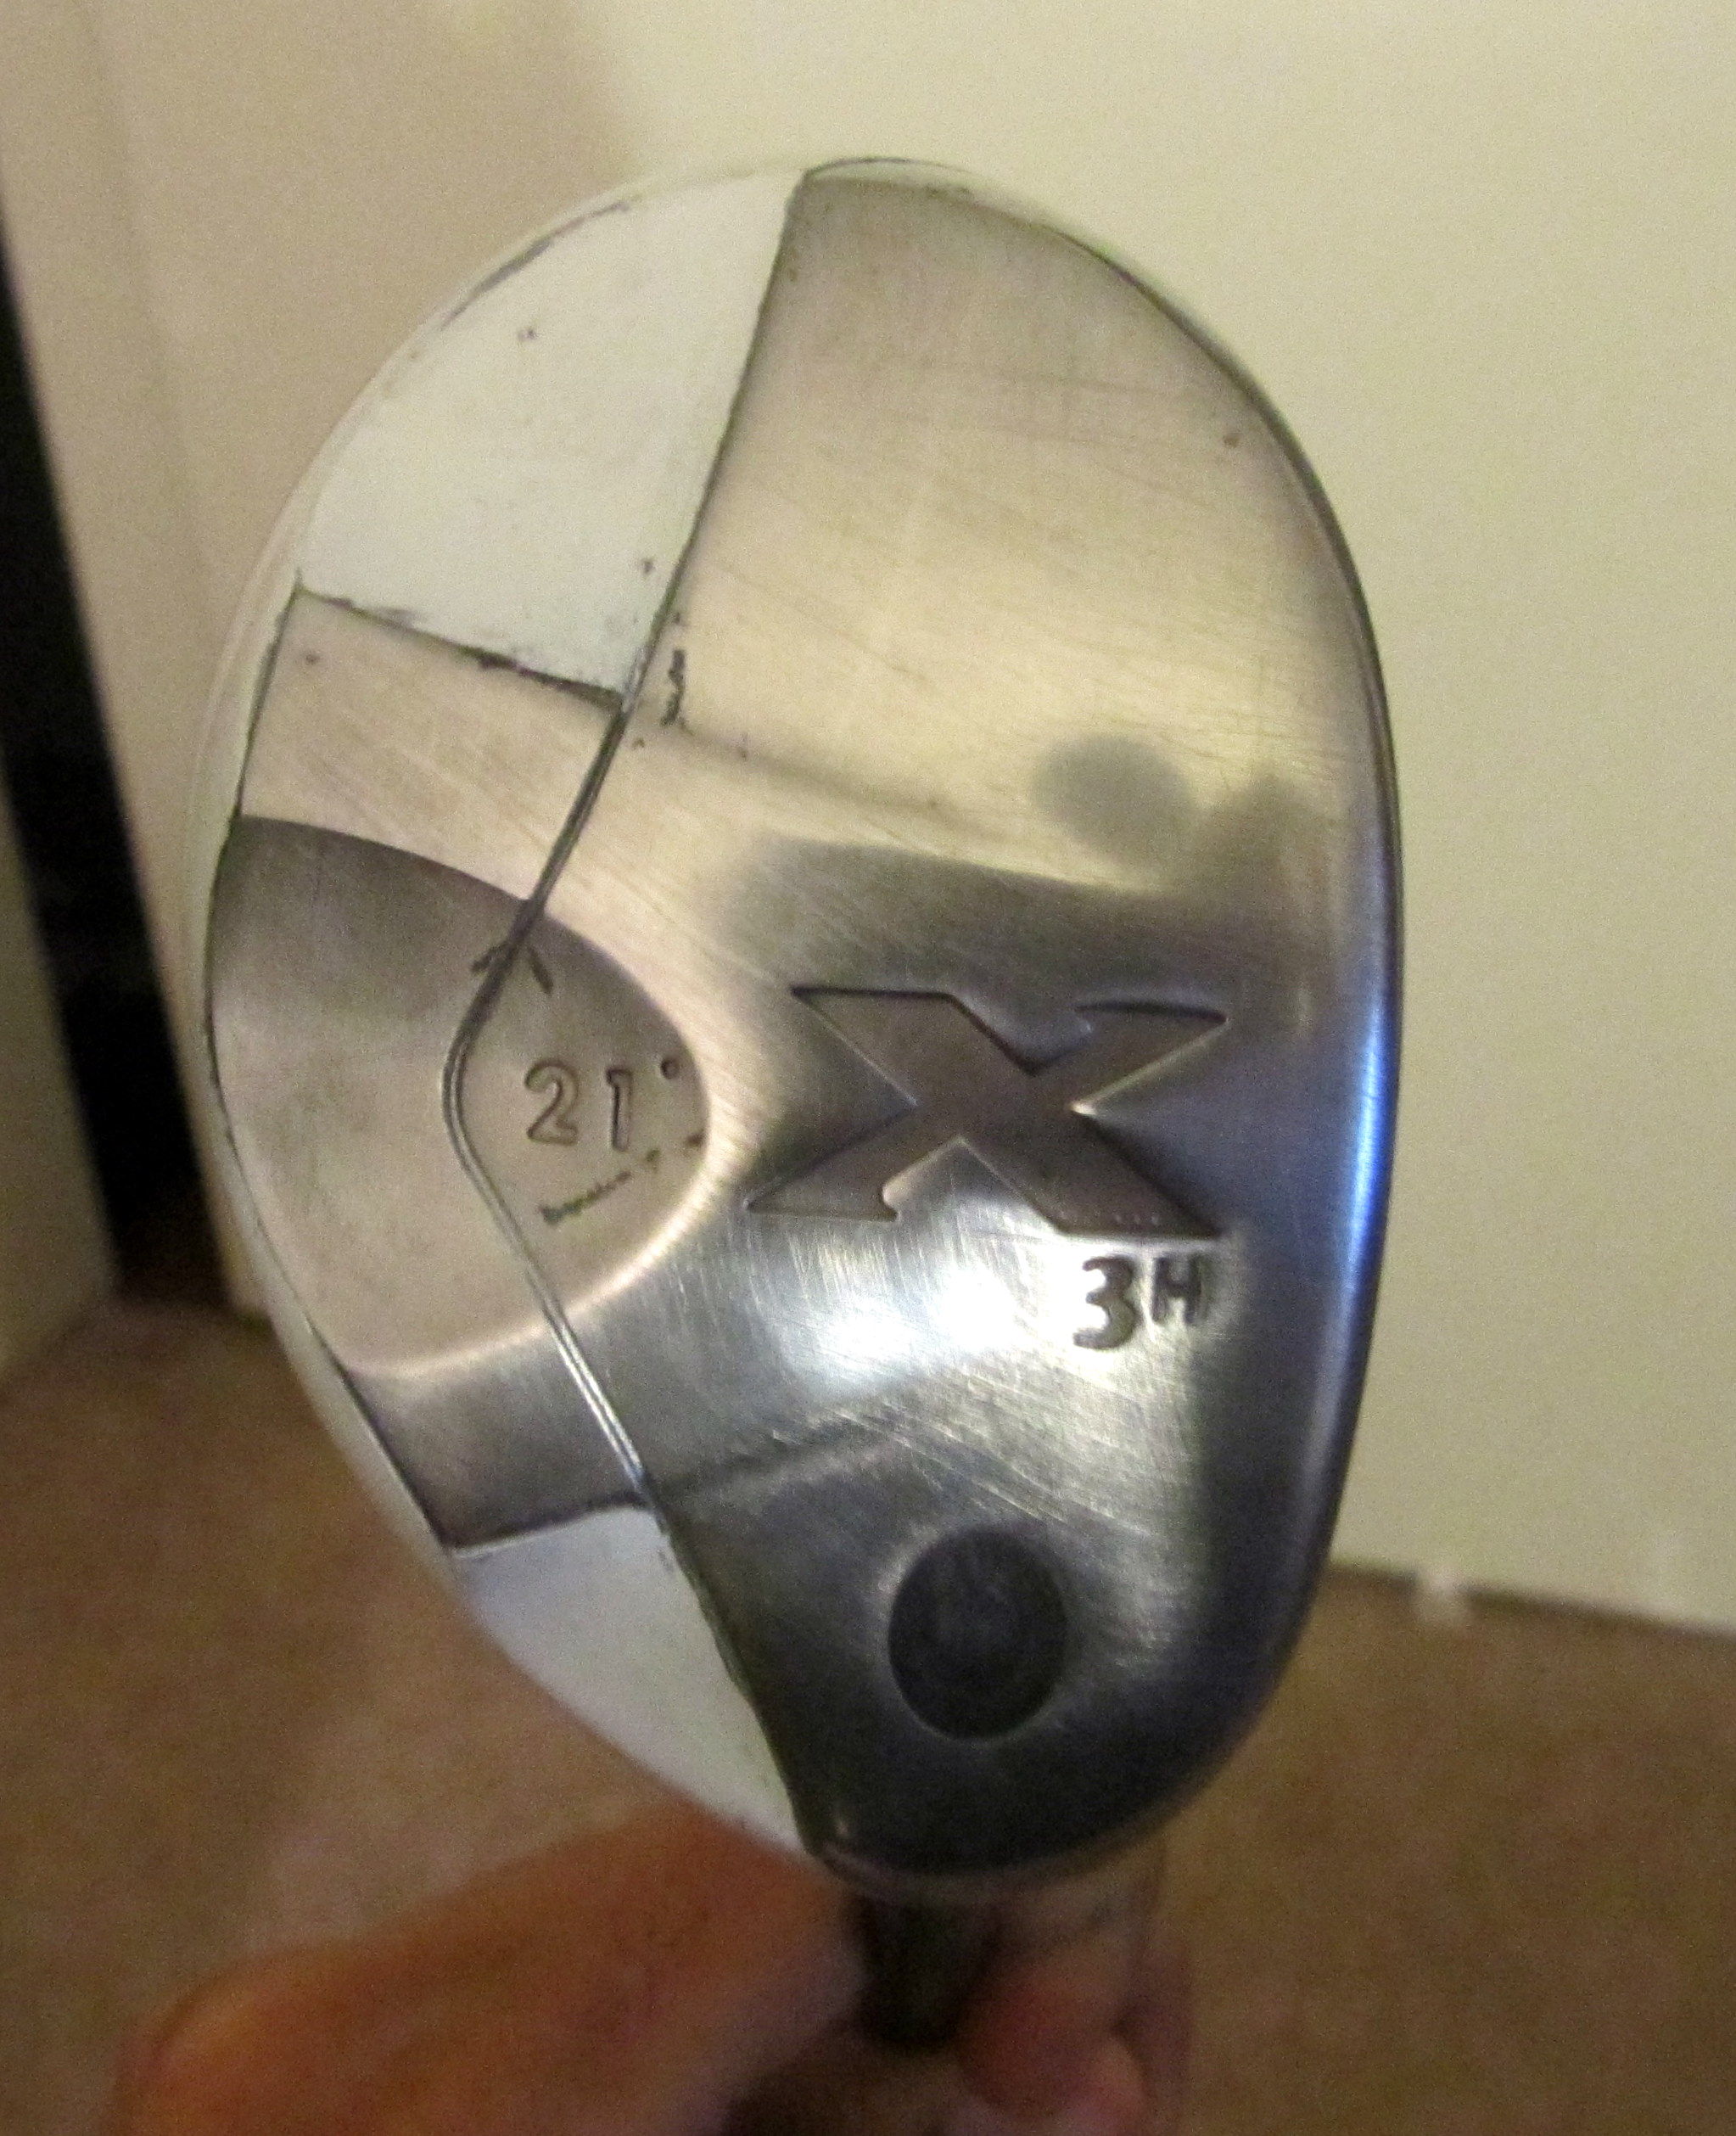
Following JK’s lead, I decided to paint my clubs. Here are the before and after shots, as well as a description of my shortcomings and new tips.


Problems I encountered:
1) White is REALLY hard to get right. Be sure you’re committed to taking the time to do this process correctly if you’re going to go with white. The results (particularly the driver) are pretty amazing when it works though.
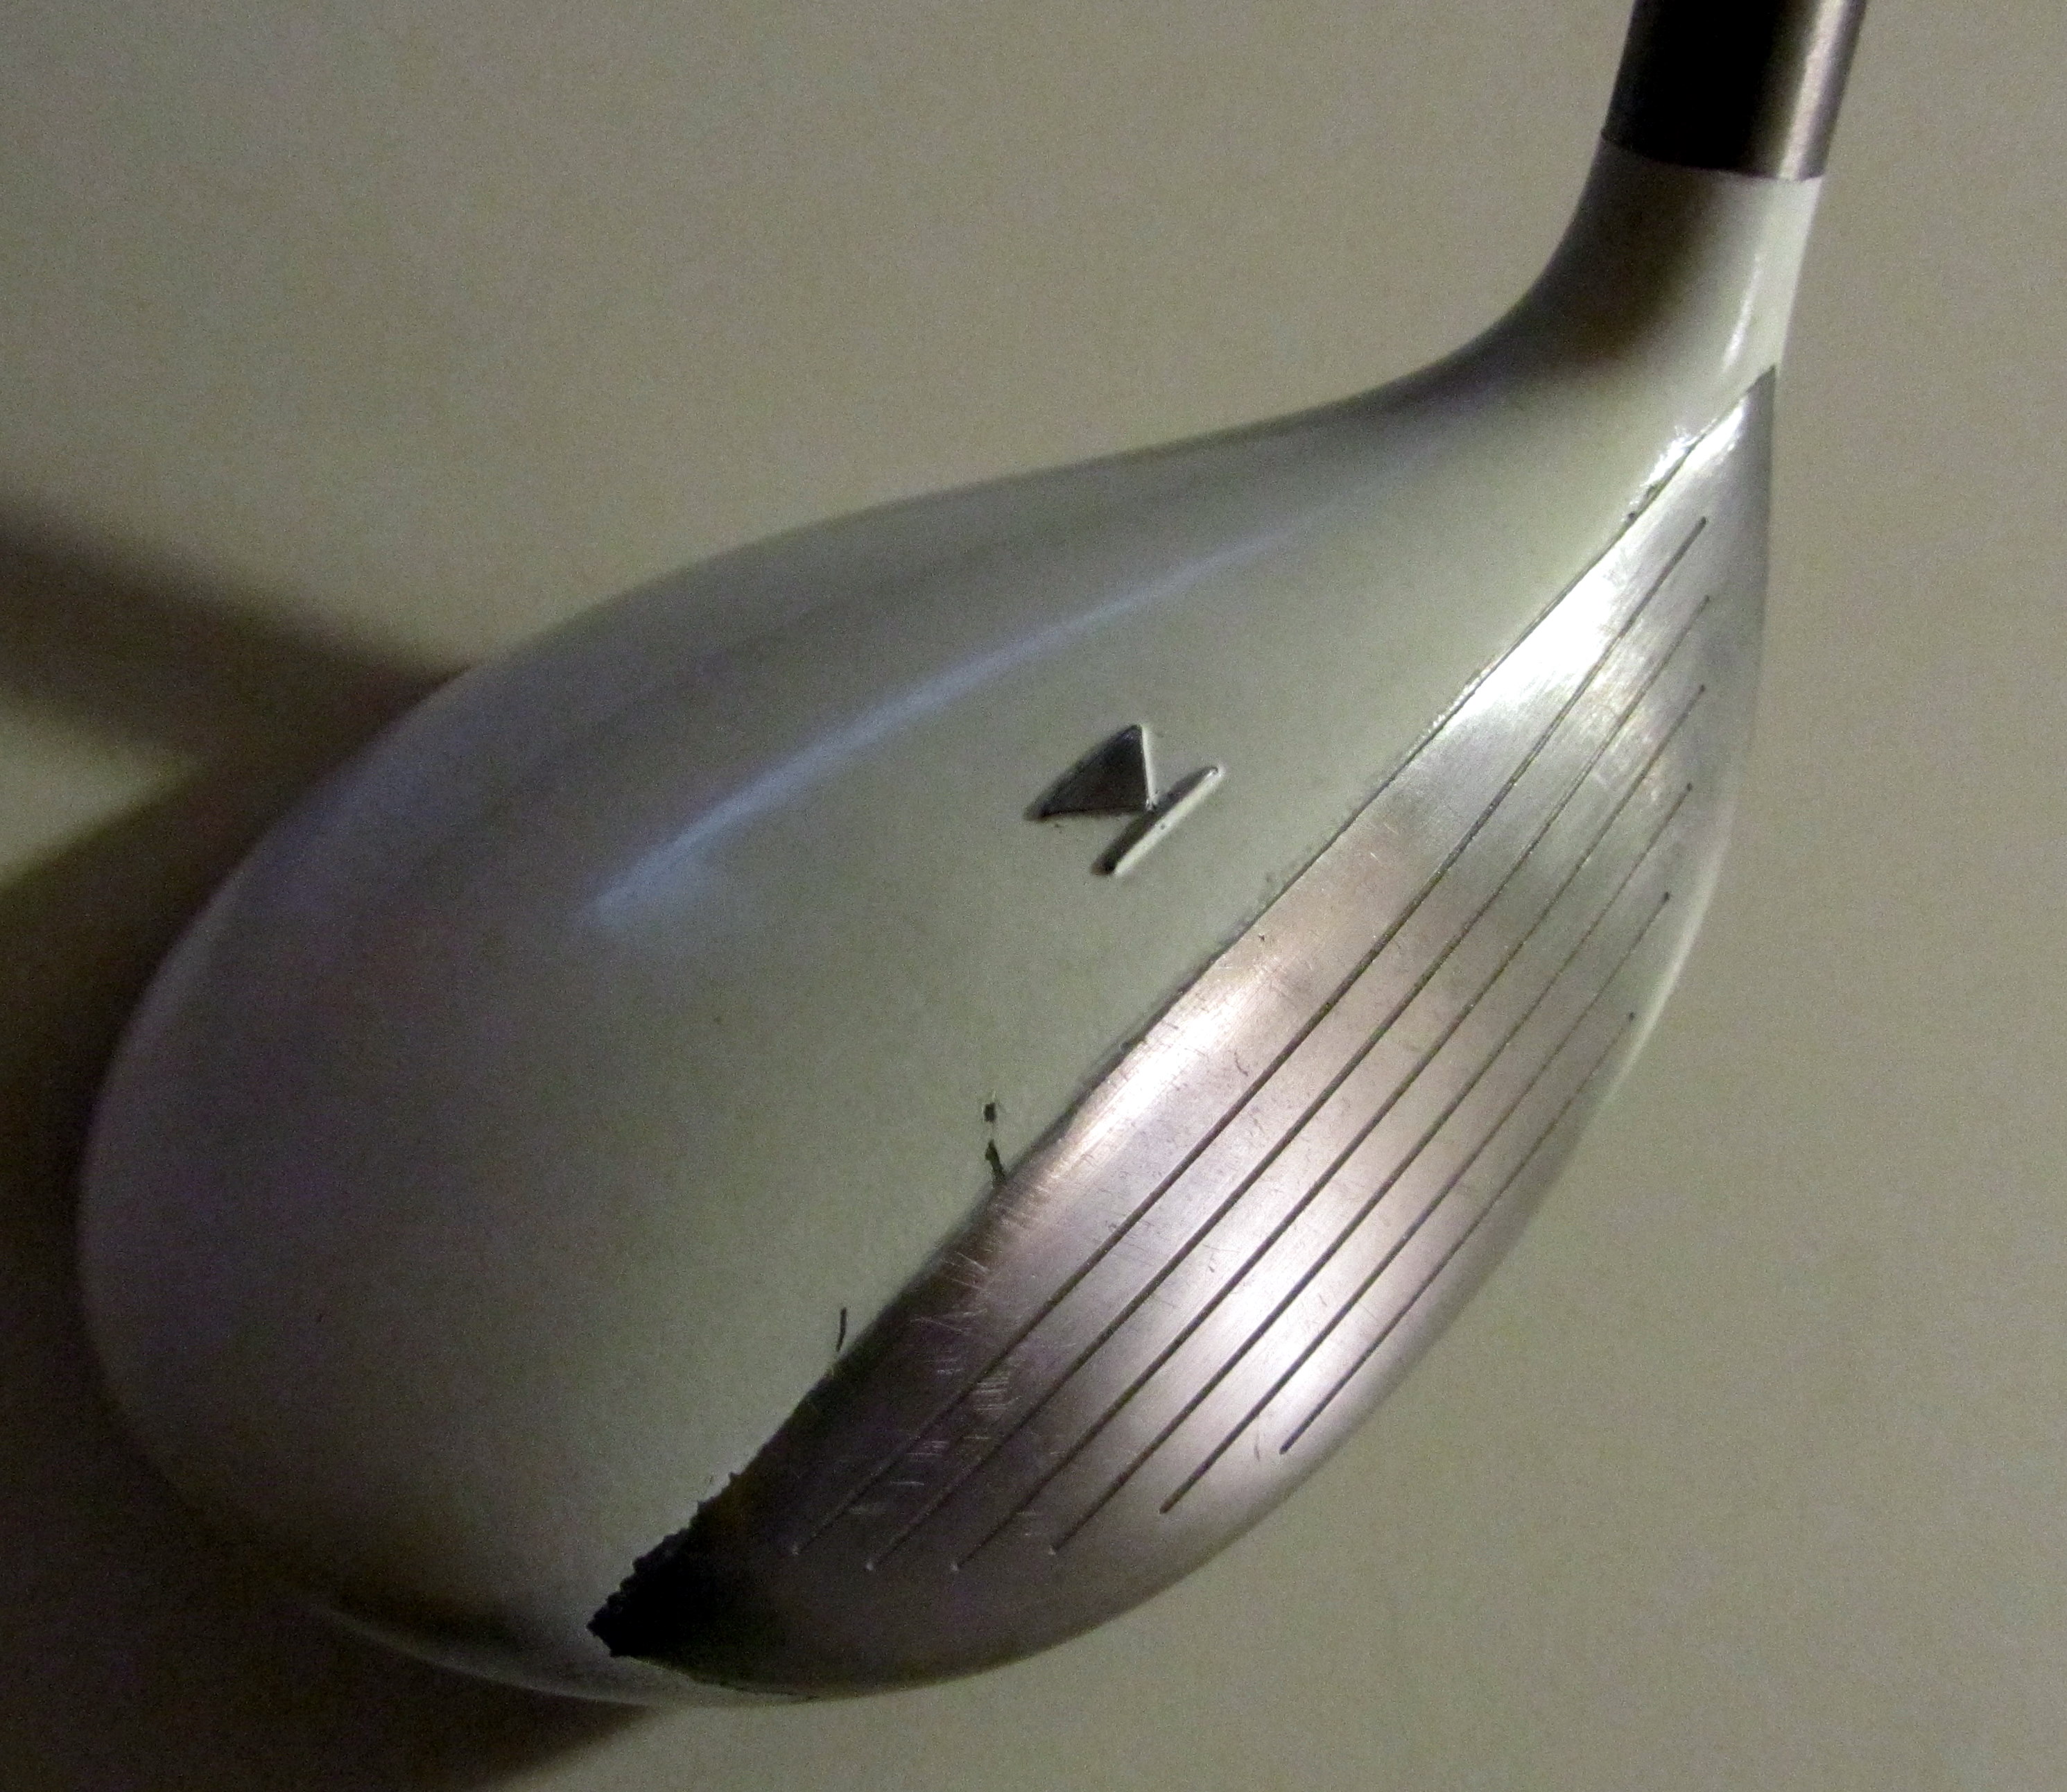
2) Electrical tape goo will mess up the paint if you catch any of it on the sandpaper during the polishing phase. Be extra careful, otherwise you’ll get black smudges like i did on the Titleist 3w and the Callaway hybrid.
3) Take as much time as you can with the taping. At no point do you want to have to free hand the edges with a blade. Otherwise you’ll end up with scratches. See, for example, the face of my 3w :(.
4) Don’t use too much paint on any one layer – you’ll end up with something that looks like the Callaway hybrid here.
Tips:
1) Use the paint stripper (Mar-hyde brand Tal-Strip Paint remover) I used in the previous post: Quick Tip: New Life for Old Irons. This stuff works great for getting the paint off the crown of the club too. Rather than the labor of sanding, the paint will simply flake off 10 minutes after you spray it on. WARNING – use proper eye, nose, face, and skin protection when using this substance. I accidentally touched a glove that had some on it with my bare hand and it burned like crazy. This method is MUCH easier than sanding.
2) Be EXTREMELY careful during the sanding process around any edge and any place where paint meets tape. These are the most likely areas for breakage. If you’re particularly worried, don’t sand these areas until the paint cures after 4-5 days.
3) JK recommends waiting 15 minutes between coats. I waited 20 between coats on the driver and really like the results. be your own judge, but don’t tack cloth the club until the paint is dry to the touch. This is a mistake I made with the hybrid and the result was mediocre at best.
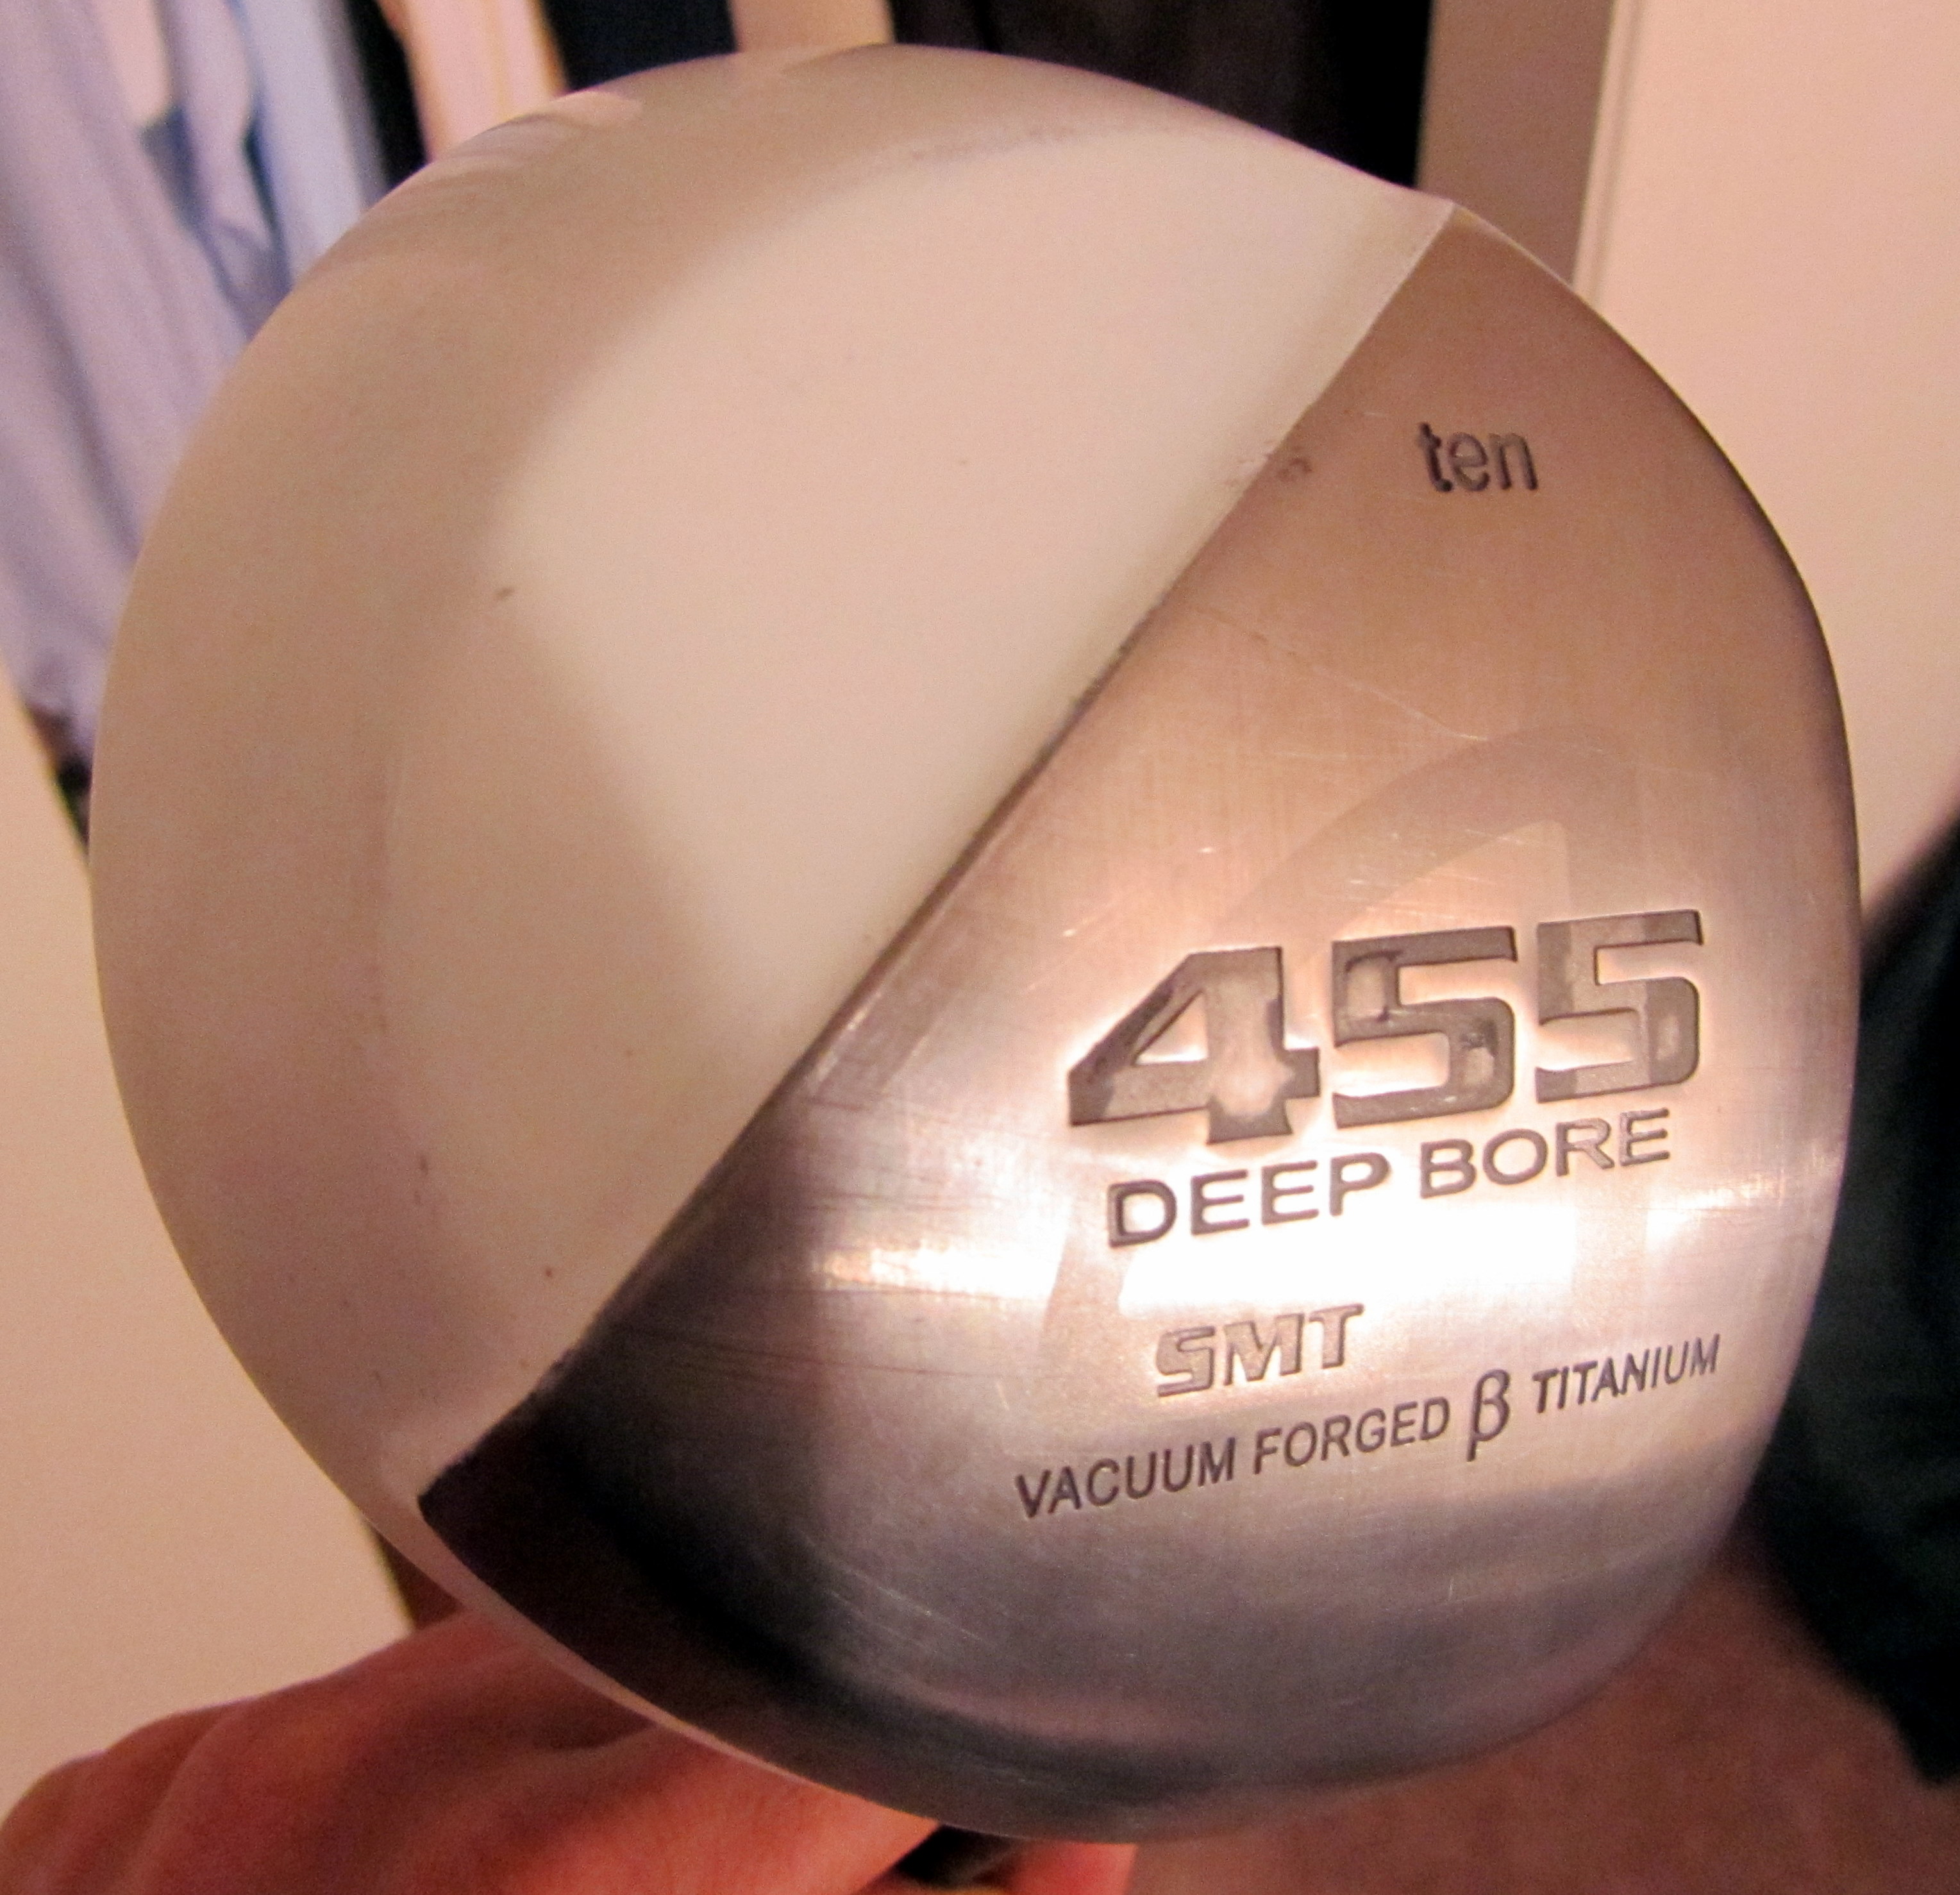
4) If you have a lot of scuff marks on the face of your club, you can smooth them down, and in some cases get rid of them all together by giving them a good sanding with the 2000 grit sandpaper you have left over. This really cleaned up the face of my SMT driver and the non-grooved parts of my 3w and hybrid. See for yourself!
5) Raised symbols/alignment markers – I was worried about painting over the arrow/line that are on the crown of the Titleist 3w. I wanted them to stand out even after the new paint job because I like to use them to line up shots. In order to make sure they’d show up, I took a razer and carefully cleaned off all the layers of paint that had built up on them prior to applying the clear coat. I later realized this was probably unnecessary due to the sanding process. JK did not do this and his results turned out just fine. I also recommend the use of a metal needle for really fine clean-up jobs.
All in all, I consider this attempt a good learning step toward the final product that I hope to achieve. Consider the above pictures a decent first attempt, but a promise that better results can be achieved with a little practice. Next up, I will see how long this paint job lasts and hopefully come up with another color that is more forgiving to try next time. Like JK says about this kind of painting, there’s a certain comfort you can take in knowing that if you mess up, all you have to do is spray the paint remover on and start over again.
Happy Painting!