Who is this?
February 13, 2012
Yesterday, Phil Mickelson won the AT&T Pebble Beach National Pro-Am, coming back from a 6 shot deficit at -9 to start the day Phil posted a 64 on the final day, while Tiger Woods posted a 75. We had been told all week how Tiger was getting back, getting better, getting closer, “feeling it.” Instead, he laid an egg AGAIN on a final day–a day when his arch rival played his best.
But that’s just it–for the Tiger I know, there’s no way Phil Mickelson COULD HAVE shot a 64 on a final day. The aura of Tiger would have engulfed him long before he could get rolling.
Now, I’m a happy camper to see something as exciting as yesterday’s finish on a cold Sunday in February. Golf can only hope for such a great thing to happen more often. But it showed us how far we’ve come since TigerGate. And, it shows me definitively:
this is not Tiger anymore.
There was a time when the mere sound of a Tiger crowd roar caused other players to miss putts, to flub bunker shots, to hit errant drives, to push themselves too far. Yesterday, I watched in awe as Tiger holed out from a bunker for birdie, only to see Phil make a 30-foot putt to save par. Years ago, Phil would’ve 3-putted under the circumstances.
You have to give credit to the guy who won–Phil played excellent golf. But I can’t help but wonder who it was that lost. This isn’t Tiger. This is something else altogether.
This post follows up on the Caswell Stainless Blackener post found at https://thepowerfade.wordpress.com/2012/01/03/restoration-and-review-caswell-stainless-blackener/ and on the Club Repair post found at https://thepowerfade.wordpress.com/2011/12/12/club-repair-restoring-a-putter-part-1/.
I decided that, although the Caswell was helpful, it was not perfect. Thus, I went ahead and smoothed out the dings. I used a flat file to take out the big dings (if you decide to do this, you must be very careful wit the flat file–it can do a lot of damage). Then, progressive sanding with 60 grit, 180 grit, and then 400 grit sandpaper smoothed out most of the dings. In some cases, I did have to go back with the 60 grit because the scratches with the flat file were very evident. Even then, I still haven’t totally gotten all of the marks off of it.
The reason I did not go beyond 400 grit in this case is twofold: first, I didn’t have the time to get everything perfect and make a mirror shine. The several dings that are there would be much more evident if the rest of the putter were mirror finished; second, I wanted to keep the mill marks on the face, which meant no sanding of the face of the putter. I reasoned that, if I didn’t go beyond 400 grit, the face wouldn’t look too far off from the rest of the putter (since I don’t have a bead blasting cabinet). The process and results are below.
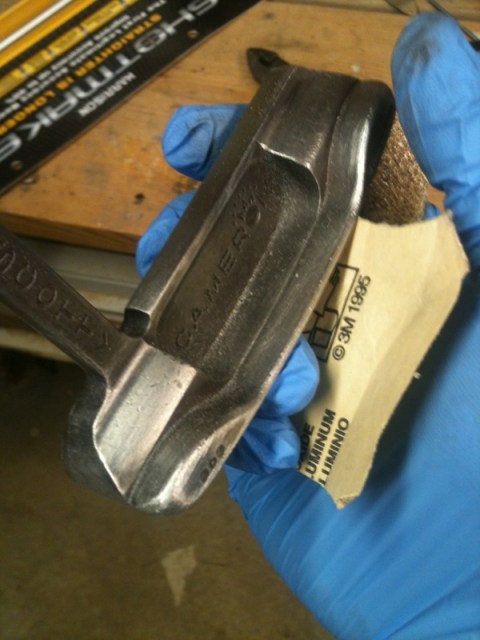
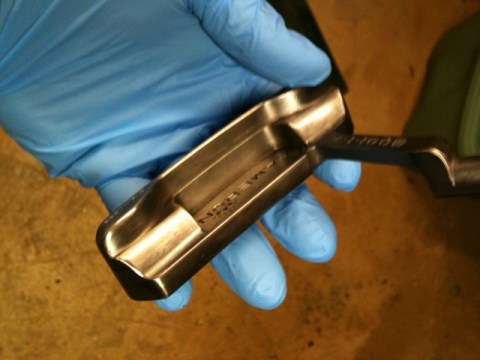
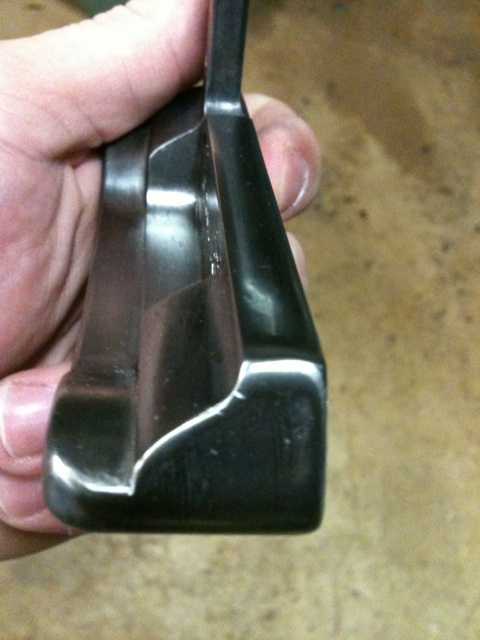
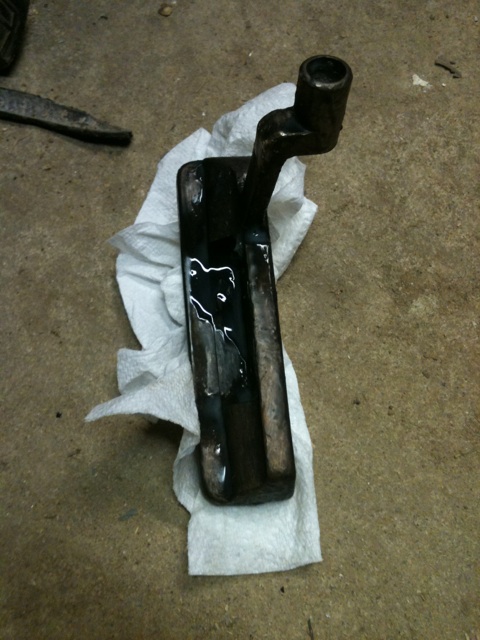
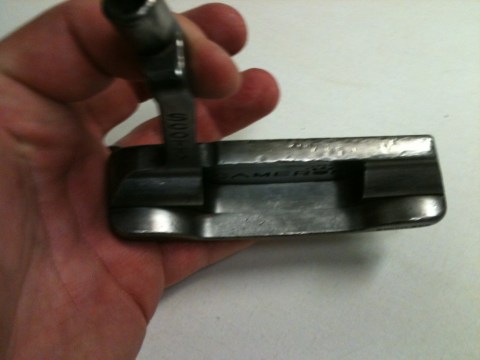
Here is the head before significant sanding. You can see that the blackener worked well before. Part of the sanding will help me take off that blackened finish.

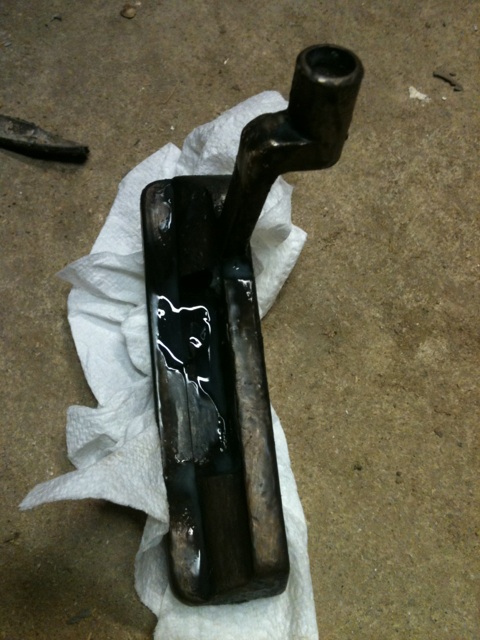
When the sole is partially sanded and partially blackened, it’s easy to see where the dings are. Ouch!

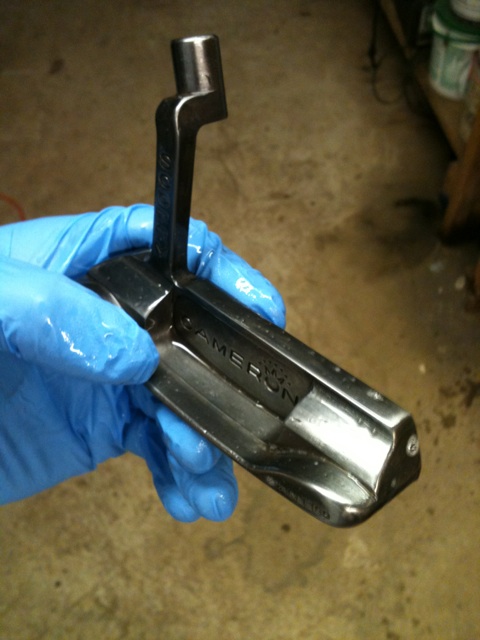
I’m staying away from the face as much as possible. The dings on the top line are hard to deal with when doing this because you can’t easily smooth them out without affecting the mill marks. I’ll do my best.

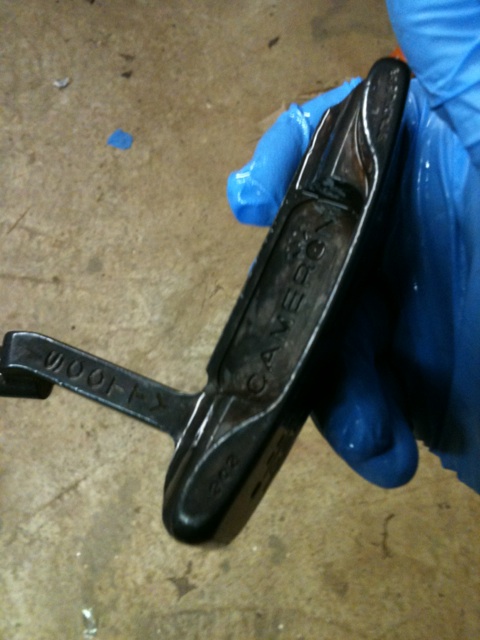
See how much smoother the heel is now that it’s been filed and 60-gritted?
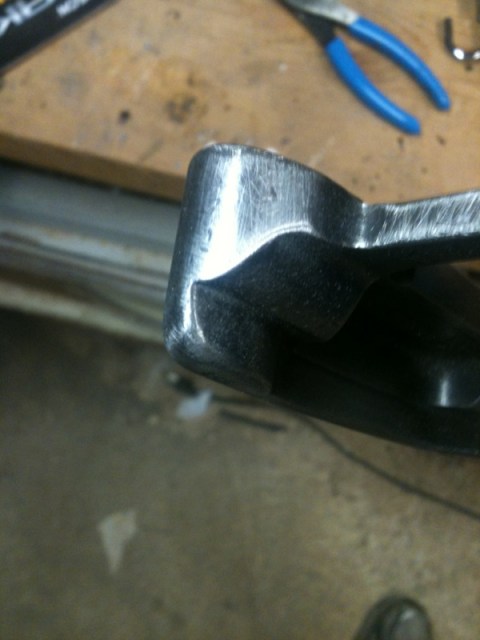
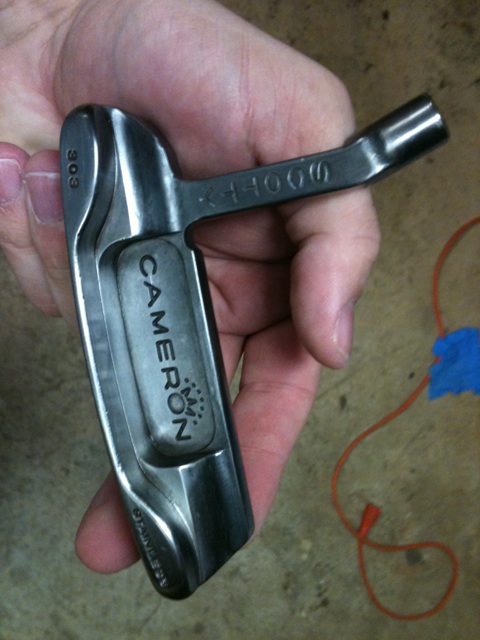
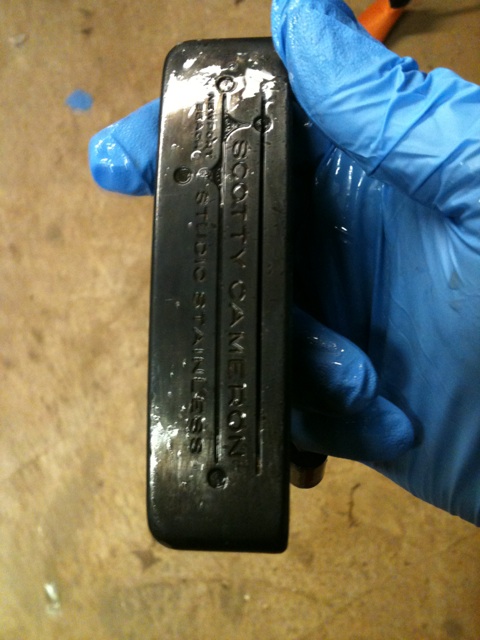
The top line looks 1000x better now.

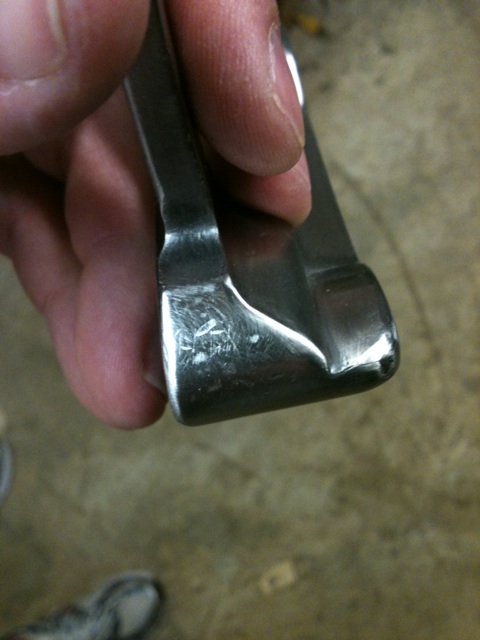
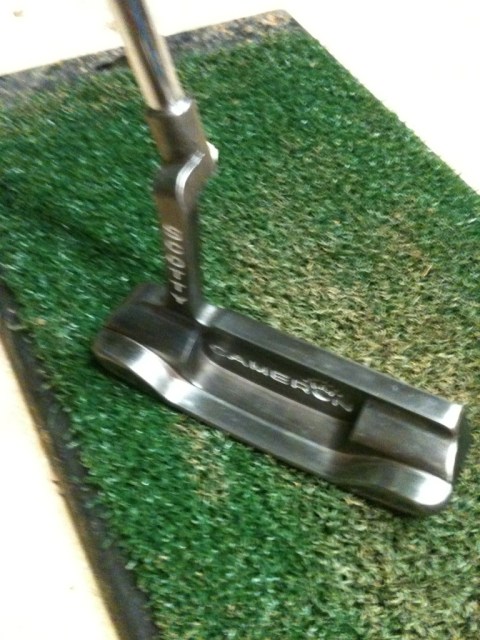
And now, after complete sanding with progressive grits, you can see there is a little shine to the head, but not like the mirror finish in other posts (see https://thepowerfade.wordpress.com/2011/12/12/club-repair-restoring-a-putter-part-1/)


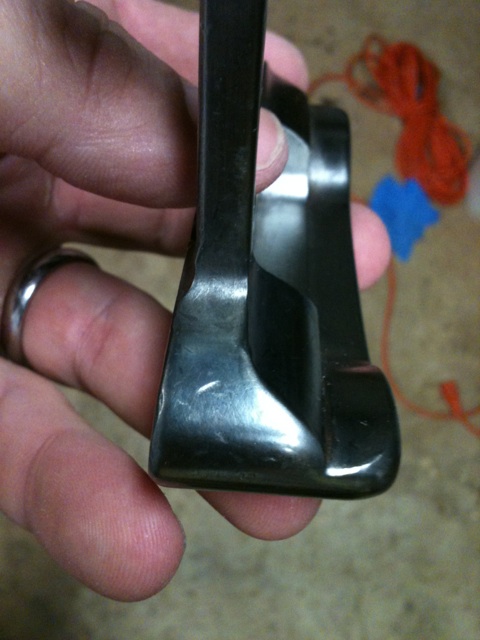
I’ve cleaned up the face just a bit with 400 grit paper to help the blackener stay smooth.

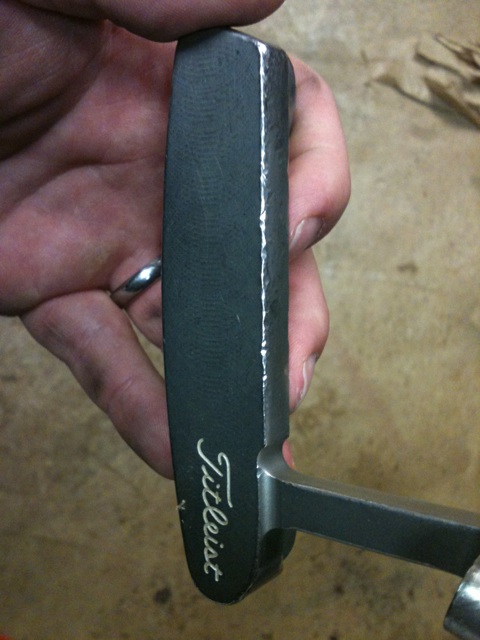
Here’s the final top line. Looks a lot better

Blackening was virtually the same process. This time, I used much less blackening paste and it worked out about the same, so conserve that stuff. It aint cheap.
I worked the blackener around with a GLOVED HAND (wear a glove, or your hands will really stink) to smooth it out. When the blackening was about even and had been on for a minute or so, I quenched it in a bucket of cold water and rubbed all of the paste off. Then I smoothed out the blackener by rubbing any uneven spots with steel wool. The result looks pretty good. (The wet looking photos have the sealer applied).


Altogether, not too bad. Here’s the final product:

Adding a little paint fill (there’s still more to go)

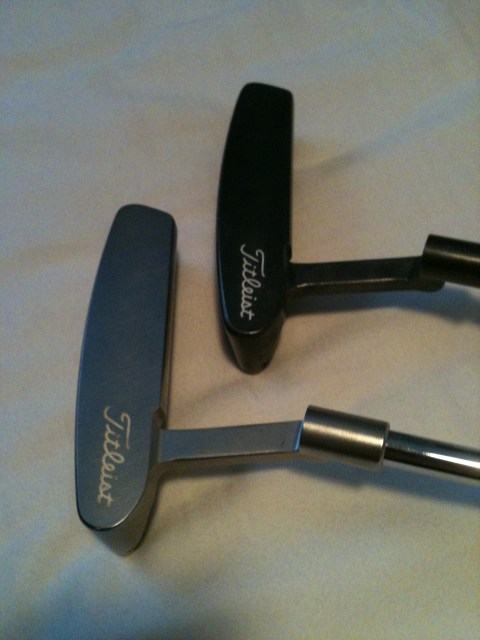
The color is kind of hard to see in the photos. Here’s a comparison to my stock Newport Beach.

Restoration and Review: Caswell Stainless Blackener
January 3, 2012
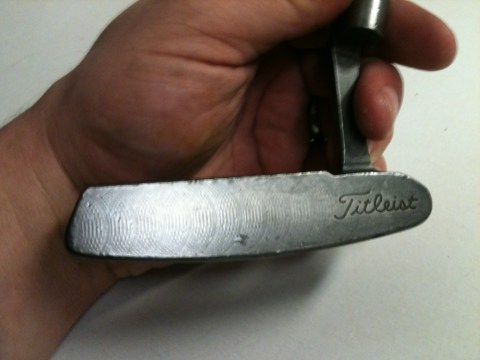
This post is a restoration of a Scotty Cameron Newport Beach that has seen better days. The purpose of this is to review Caswell’s Stainless Blackener product.
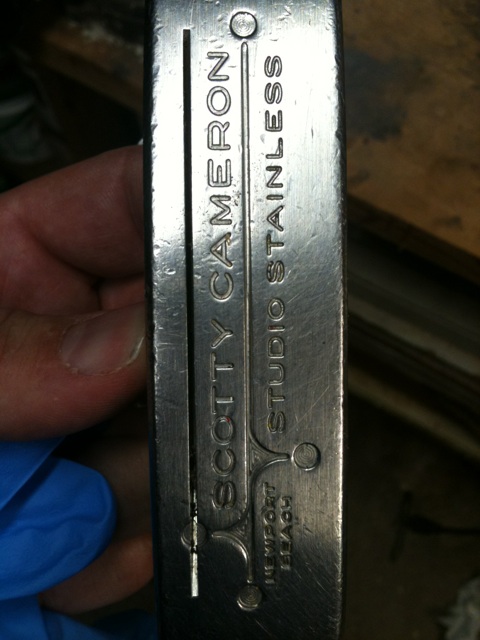
The putter is seen in the photos below before restoration.

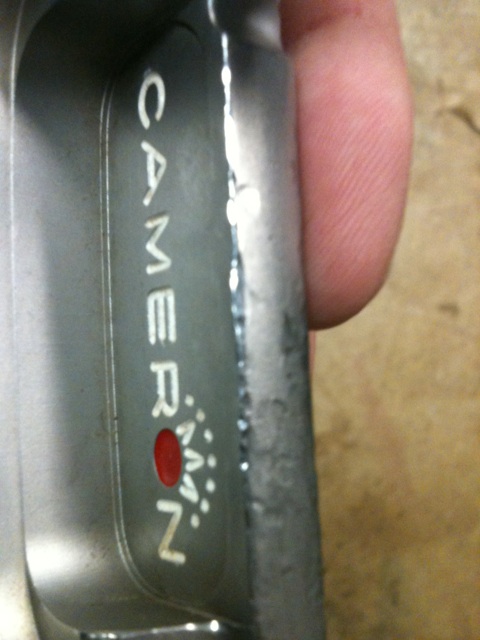
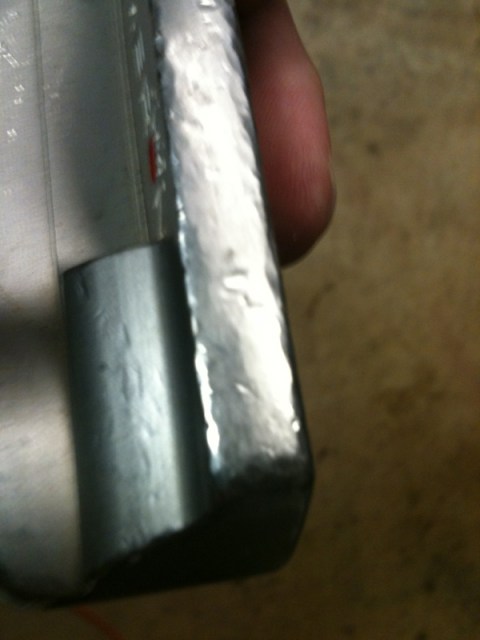
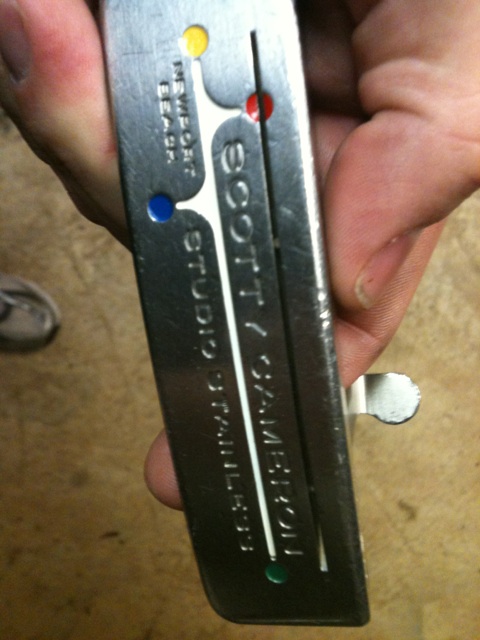

As you can see, it’s had a rough time. I’m hoping to show that it’s possible to make a putter look better simply by blackening the finish. I’m not sure what I’ll get here.
The first step is to remove all of the paint fill. Don’t mess around with acetone, as it can take awhile. Instead, as LG noted in his post on removing paint fill from irons (see https://thepowerfade.wordpress.com/2010/12/17/quick-tip-new-life-for-old-irons/), automotive paint stripper works very well and very quickly with little work.
The process of putting the blackening on can be done several different ways. This blackener is gel. Once the blackener is applied, a sealant is used. Both are included with the kit:

First, you must clean the steel with water. Soap would probably help. The instructions say “clean until it passes a water break test.” Essentially, clean it until water flows over it evenly, without breaking.
The blackener is applied by simply placing on the putter and allowing it to work. I found that it worked best for me if I used a gloved hand (VERY IMPORTANT OR YOUR HANDS WILL STINK LIKE CRAZY) and continuously rubbed it around. This process helped get a little more even coating.


When finished, rinse with water and apply the sealant.

Once the sealant is applied, the putter is virtually done. Clean it up with water and take photos


This process was remarkably easy. Although it didn’t turn out as well as some of the professionally blackened putters, it nonetheless has real potential to turn out that way if continuously applied. A few more applications and I’m certain it would be nice and dark.
I got this kit second hand for $25. I believe they’re around $40 new, but there is enough to do a number of putters if you chose to.
As for results, well, it doesn’t look perfect. And, as I often find with putter finishing, the better-prepped the surface, the better the finish looks. For example, on this putter, the sole turned out the best with a nice dark, even color. However, it does look better than it used to, and it did give me a chance to play around with this stuff. I’ll do some restoration work, take the dings out, and then re-blacken it in the future.
Cost: 6
Value: 7
Ease of Use: 8
Finish: 8
Overall: 8
We’ll see how it turns out once the full restoration and ding removal happens. I’m sure it would probably give me a much more favorable opinion on this product.
Removing a Grip — Without Damaging It
December 31, 2011
This is a post that I put together in February of this year (2011). I never got around to posting it because the results were not great. However, I do think my experiences would be beneficial for someone out there looking to do this.
With this post, I was attempting to remove a putter grip without damaging it. Iomic grips can be $25/grip. As such, finding a cost-effective way of removing them from old putters can be a beneficial way to save money, as putter grips tend not to wear out as quickly as others. I had a putter with an Iomic grip, and I am not a fan of Iomic grips. I decided to pull it both because I had a friend I could give it to and because I thought it might be a good topic for the blog.
Here’s what I used:
1. mineral spirits
2. an old paper towel roll
3. a large plastic bag, preferably zip-lock (must be sealed to fluid–shopping/trash bags will not work)
4. a sink drain
5. a prop (in this case, a wire rack and a cutting board)
6. a screwdriver
Typically, when I install grips, I use standard grip tape. I place mineral spirits on the grip tape to loosen the bond, slide the grip on, wait 15 minutes, and I’m ready to go. I decided that this process might work in reverse–if I could get the mineral spirits inside the grip, perhaps I could slip it off.
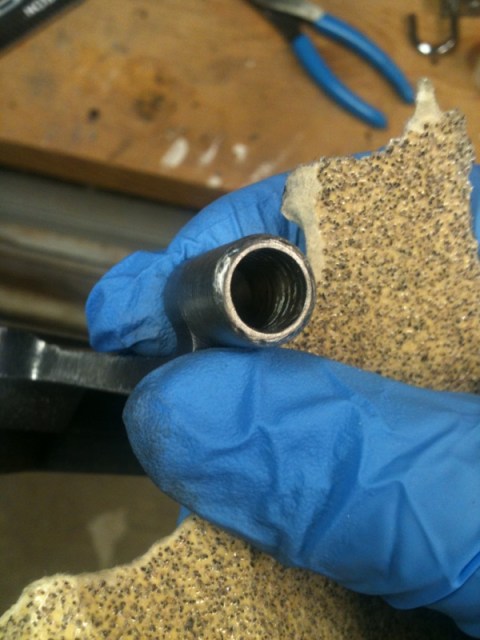
To do this, I took the large plastic bag, and put it over the grip end of the shaft. I placed the bag and the putter grip (still over the end of the shaft) into the paper towel roll as a means to restrict the expansion of the bag, thereby requiring as little mineral spirits as possible into the bag. I then filled the bag up with mineral spirits until the level of the fluid was higher than the edge of the grip. I let it sit for 20 minutes to allow it to “soak in.” See photos below.


What I failed to realize is that the mineral spirits does not penetrate well. I’ve heard of others using WD-40 because it penetrates small spaces better and contains mineral spirits in it–I might try that next time. Regardless, my vision of the grip slipping off with ease was nowhere near reality. Instead, I worked the mineral spirits down into the grip using a screwdriver to GENTLY pry away the grip from the shaft (be careful–I’ve broken more than one grip trying to do this). Eventually, enough got in that I was able to twist some parts of the grip relative to the shaft. I worked at it for 15 or so minutes, which was an enormous amount of effort. Eventually, the grip came loose.


If I had another Iomic grip, I could probably do this again with better success if I tried WD-40 instead and/or if I had a better tool to work the mineral spirits down into the grip. Something thin, fairly rigid, and as long as the grip would work best–perhaps a portion of an old shaft? Regardless, the method did work, but it was not as simple as I expected. It probably would not be worth the effort for a $4 Lampkin or Golf Pride grip.
If you have access to an air compressor, use that method (blowing into the hole on the end of the grip). However, if you’re like me and prefer an at-home DIY method, this might be a viable method, assuming you make a few tweaks.
——————————————–
12/31/2011 Update
I tried this method again recently, except I did two things differently. First, I did not soak the grip as shown. Instead, I just used a small screwdriver to pry the grip away and squirted fluid between the grip and shaft, working the grip around until it came off. Second, I used acetone instead of mineral spirits, which worked MUCH better. Some photos are shown below.


The issue with this method is shown in the last photo. If your grip has anything painted on it, acetone may loosen the paint and cause some damage. However, for most grips, this isn’t an issue, and you’ll be able to save it without much loss–or, you can simply repaint the portions missing.
Merry Christmas
December 24, 2011
From us here at the PF, we wish you a merry Christmas.
-JK & LG
New Post Now Ready
September 15, 2011
We apologize for misposting the currently-posted review of Wolf Creek in Mesquite, NV. The post is up and running at https://thepowerfade.wordpress.com/2011/09/15/course-review-wolf-creek-mesquite-nv/
Thanks to all our readers.
-JK
How to Swingweight a Set
March 23, 2011
This particular article will be helpful for LG, so I decided to go ahead and build up a post about this.
I recently swingweighted my iron set–KZG ZO blades. The shafts were shorter than I was used to, so I decided I wanted them to play at a higher swingweight in order to make up the lost leverage.
First things first, get your supplies in order:
1. Two-part epoxy – depends on size, but enough for this job is $5 or so.
2. ferrules – make sure you get the right size for your irons, which can range from .335 to .370; I bought mine on ebay, and you can really spend any amount of money you want to on them. Approximately $5, we’ll say. Search on ebay for “ferrule .XXX” where .XXX is the tip diameter you need.
3. Swingweights. This part is a little more difficult, and can be expensive. A full set of swingweights isn’t a good idea. I would recommend you figure out what you need first and then go online and buy them. I got brass weights on ebay from a great seller todd1186 (he’ll combine shipping if you just ask, see http://cgi.ebay.com/6-Gram-Brass-Tip-Weights-370-Steel-Iron-1-Dozen-/250722289456?pt=LH_DefaultDomain_0&hash=item3a60368730).
4. A swingweight scale. These can be anywhere from $20 used up to hundreds. If you’d prefer not to use one, you can always take them to your local golfsmith or edwin watts store and ask them to spec it out for you. If they’re not busy, they might actually do it, especially if you’re telling them you’re considering having them swingweighted.
5. Acetone. $4 at home depot
6. A kitchen/postal scale. $4-$6 on ebay
7. Lead tape (or other weight)
Now, that’s about it for supplies–sans paper towels, newspaper, and other cheap stuff.
Once you know what your current swingweight is, you can decide what you want it to go to. Typically, you will want to increase swingweight because OEM sets are typically a little light on the scale. Typical sets will run D0 or lighter. Most pros like Read the rest of this entry »
Restoring a TeI3 Long Neck
March 16, 2011
Those who frequent the PF know how much I appreciate the ability to perform your own customization and repair work. Especially given the winter weather, I’ve spent a lot of time indoors and have had time to work on equipment (and posts about that work). Today’s post is no different.
I recently got a wild hare when I saw a post on GolfWRX about restoring a Scotty Cameron TeI3 putter (in 2 hours!). The pictures are gone, but the instructions still hold: http://www.golfwrx.com/forums/topic/444256-how-to-restore-a-scotty-tei3-in-2-hours/.
Following this advice, I got out the sandpaper (from the repainting thread, https://thepowerfade.wordpress.com/2010/11/30/repainting-a-club/) and purchased Birchwood Casey Super Blue and Alex Ultra (for elastomer). The B/C cost me about $9 (which was overprice–it should have been under $6, but it was convenient) and the elastomer cost me $4. I also purchased Sally Hansen Hard As Nails fingernail paint to do the paint fill ($2).
The instructions do an excellent job of laying out what to do, but I also got some personal attention from the OP. I purchased a TeI3 with a problem and decided to set myself to work. Here is what it originally looked like:


As you can see, there are rust spots and a few dings, including one on the rear flange and a pretty significant one on the face.
I started by taking a single bastard file (that’s what it’s called…really) which is basically just a flat file with only one line of “cutters.” As stated in the WRX post, I left the insert in the cavity while filing to make sure they were at least planed with respect to each other. The difficult part is getting it consistent without making big scratch marks. I found that the dings came out pretty easily, but the file itself left scratch marks that I had to massage with light pressure on the file and progressive grits of sandpaper to get smooth.
Once I had the dings out, the KEY is to make sure you POLISH IT with sandpaper–and do it EVERYWHERE. Don’t skimp. All the little crannies, all the surfaces, make sure each of them SHINE with at least 800 grit. I went up to 1000 or 1500 (cant remember which) just to be sure. It hurts. It takes forever. At this point, I was thinking “why the hell did I do this.”
Then, you blue it with B/C. In my experience, this was awful. I could never get it dark enough to make it look like either (1) original or (2) how the OP on WRX did. You have to put the gun blue on, then wait 30 seconds, wash with cold water, then smooth with steel wool, then rub with degreaser (I used Simple Green), then wash the degreaser off with cold water, then dry with a hairdryer until bone dry, and then reapply until the color is as dark as you want. However, I got to the point where I would put the blue on, work with the steel wool, and the color would come right back off with the steel wool. I finally resigned myself to the fact that it wasn’t going to get any darker and it looked OK as a light brown finish. After some more smoothing with steel wool, I cleaned it, oiled with baby oil, and degreased to make a nice clean surface. I put in the elastomer (as per the WRX post), screwed the insert in, and cleaned off. Then I applied the white “paint fill” (nail polish) and the gold paint fill (gold instead of copper because I had some gold lying around). The result is below:


Practice pointer here: if you’re using gun blue, WEAR THE GLOVES like the OP says. Otherwise, your hands end up smelling like cat piss for about 3 days (I know), and you can’t wash it off. Further, do the sanding outside/somewhere ventilated. And, most importantly, don’t be afraid to take your time. The project is kind of complicated (especially the first time). In fact, I’d recommend you don’t do it, but, then again, I did it, so I can’t prevent you from it. Hopefully it will turn out better for you. I just didn’t know how to gun blue. All in all, though, I’m actually pretty happy.
What it costs/what I needed:
1) a TeI3 putter (anywhere from $70 to $170 depending on how bad it is)
2) gun blue ($6)
3) elastomer ($4)
4) “paint” (about $5)
5) sandpaper (already had from previous postings, but about $10)
6) steel wool (about $3)
7) a hair dryer (you should probably have one)
8) paper towels (minimal)
How to Grind a Wedge
February 14, 2011
To start, I always like to point to my references. GolfWRX provides the background again:
http://www.golfwrx.com/forums/topic/53415-diary-of-a-wedge-grind/
http://www.golfwrx.com/forums/topic/22167-grinding-a-wedge/
Grinding a wedge is a pretty neat process. It takes a lot of patience, care, and confidence to do it right. But making a club that’s exactly to your own specs is pretty amazing–and, of course, I wouldn’t do it if it weren’t at least a little fun.
I started with an old wedge–Tommy Armour. It had an ungodly amount of bounce, so I decided it was a good test piece. If you don’t have a wedge you want to sacrifice, Golfsmith sells grinding blanks for $10/head (see http://www.golfsmith.com/products/SE2886/Snake_Eyes/Custom_Grind_Wedge_Head). Pics of my starting wedge below:


Before starting, you need:
1) either a belt sander or a grinding wheel
2) a sharpie
3) gloves
4) safety glasses
For my wedge grind, I decided to pull the shaft from the head, as it’s usually easier to maneuver the head by itself without the shaft.


As shown in the references, the next thing to do is mark the grind with a sharpie. My goal was to replicate the Chikara wedge grind. Photos below show the Chikaras and my sharpie marking.


The advice from the WRX postings is to start where you have the most room to mess up–or, in other words, start with the place where the most material will be taken off, as you can fix a problem there easily. This was GREAT advice, as you really need to get a feel for it as you go.
I added the passes in relation to the shapie markings. The result…less than stunning.


The reason for the “bad” results was that I used a grinder. A stationary belt sander would work a whole lot better and make a much smoother cut.
However, not to worry. A WRX’er suggested that I use a metal file to smooth out the bumps. After some elbow grease, the grind looked smooth and consistent.


After a bit of sanding, the grind was done.
Altogether, I enjoyed the project. I’m not sure I’m ready to try it on my gamers. I took off A LOT of material, and I think the weight of the head really went down. However, I enjoyed the process, and now I know I COULD do it if I really wanted to.
Happy club work!
Oh, and, BTW, happy Valentine’s Day!